Developer testing is necessary. But it is not enough. A developer who writes the code also has blind spots when testing it. Quality assurance needs to go much deeper than unit tests and code reviews. This is where a Virtual CTO (vCTO) makes a measurable difference. A vCTO brings strategic oversight to QA — not just at the code level, but across processes, culture, tools, and delivery pipelines.
This blog explains exactly how a Virtual CTO enforces QA beyond what your dev team can do alone.
What Is a Virtual CTO?
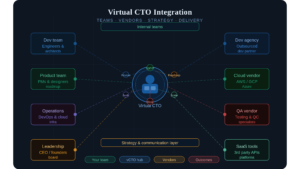
A Virtual CTO is an experienced technology leader who works with your company on a part-time or contract basis. They bring CTO-level thinking without the full-time cost. For startups and scale-ups, this is often the most efficient path to serious technical leadership.
A vCTO handles technical strategy, team leadership, architecture decisions, and vendor management. They also own QA as a strategic function — not just a checklist. This distinction matters enormously for product quality.

Why Developer Testing Has Limits
Developers are skilled at building. However, they are not always the best testers of their own work. Cognitive bias makes it hard to spot errors in code you wrote yourself. Additionally, time pressure often leads developers to skip edge-case testing.
Moreover, developer testing typically focuses on functionality. It often misses performance under load, security vulnerabilities, UX regression, and cross-browser compatibility. These gaps accumulate and eventually cause production failures.
Therefore, a dedicated QA strategy — led by someone with strategic oversight — is essential. The Virtual CTO fills this gap deliberately and systematically.
1. Establishing a QA Framework
The first thing a vCTO does is define a QA framework. This is not a list of tests. It is a structured approach to quality across the entire product lifecycle.
A solid QA framework covers:
- Test strategy (what to test and at what level)
- Test coverage targets (unit, integration, end-to-end)
- Definition of done criteria for every sprint
- Bug severity and priority classification system
- Regression testing schedule and ownership
- Performance and load testing benchmarks
With this framework in place, quality is no longer ad hoc. It becomes a predictable, repeatable process.
2. Separating QA from Development
One of the first structural changes a vCTO makes is separating QA responsibility from development. Developers still write unit tests. But a dedicated QA function — even a single tester — handles independent verification.
This separation removes the conflict of interest. QA reviewers approach the product as a user would, not as a builder. Consequently, they catch issues that developers consistently miss.
3. Implementing Automated Testing Pipelines
Manual testing does not scale. A vCTO introduces automation as a core QA tool. Automated test suites run on every commit, catching regressions before they reach staging.
Key automation layers a vCTO typically implements:
- Unit test automation via Jest, Pytest, or similar tools
- API contract testing with tools like Postman or Pact
- End-to-end UI testing via Playwright or Cypress
- CI/CD pipeline integration so tests block broken deployments
- Performance testing with k6 or Locust
Furthermore, the vCTO sets minimum coverage thresholds. A codebase with less than 70 percent test coverage should not ship. This standard becomes a non-negotiable part of the development culture.
4. Introducing Shift-Left Testing
Shift-left testing means catching bugs earlier in the development cycle. Traditionally, QA happened after development finished. This made fixes expensive and time-consuming.
A vCTO moves QA involvement to the design and planning phase. QA engineers review requirements before a single line of code is written. They identify ambiguities and edge cases early, when fixes cost almost nothing.
Additionally, shift-left testing fosters better collaboration. Developers and QA engineers think together about quality from the start. This shared ownership produces better products.
5. Building a QA Culture, Not Just a QA Process
Process alone does not guarantee quality. Culture does. A Virtual CTO builds a culture where everyone feels responsible for quality — not just the QA team.
This means celebrating bug catches, not just feature launches. It means holding blameless post-mortems when production issues occur. Moreover, it means rewarding engineers who improve test coverage voluntarily.
When quality becomes a team value rather than a department task, standards improve consistently over time.
6. Monitoring Production Quality
QA does not stop at deployment. A vCTO implements production monitoring as an extension of QA. Real user data reveals issues that no test environment can replicate.
Essential production monitoring tools include:
- Error tracking via Sentry or Bugsnag
- Application Performance Monitoring (APM) via Datadog or New Relic
- Real User Monitoring (RUM) for frontend performance
- Uptime monitoring with PagerDuty or Better Uptime
- Log aggregation and alerting via Grafana or ELK stac
7. Vendor and Third-Party QA
Most products depend on third-party services — APIs, payment gateways, analytics platforms. Developer testing rarely covers third-party failure scenarios. A vCTO ensures these dependencies are tested and monitored too.
This includes testing graceful degradation. What happens when a third-party API goes down? The vCTO ensures your system handles failures without crashing.
8. Security and Compliance QA
Security testing is often overlooked in standard QA processes. A vCTO includes security as a QA layer, not an afterthought. This means regular OWASP vulnerability scans, dependency audits, and penetration testing.
Furthermore, if your product handles user data, compliance testing is essential. GDPR, HIPAA, and PCI-DSS all have specific technical requirements. The vCTO ensures your QA process verifies compliance at every release.
Measuring QA Effectiveness
A vCTO tracks QA performance with clear metrics. These include defect escape rate, test coverage percentage, mean time to detect (MTTD), and mean time to resolve (MTTR). Regular reporting keeps the team accountable.
Conclusion
Developer testing is a foundation, not a complete QA strategy. A Virtual CTO builds the structure, culture, and tools that elevate quality across the entire product. This leads to fewer production incidents, faster releases, and higher user satisfaction.
If your product ships with too many bugs, or your testing is inconsistent, bringing in a Virtual CTO is one of the highest-ROI decisions you can make. Quality is not a cost — it is a competitive advantage.
Read More:
Why Regular WIP Reviews With vCTO Save Project From Disaster