Refresh loader

Archive : AI

Home > Posts tagged AI

Microsoft Loop Explained: A Game-Changer for Collaboration

Microsoft Loop: A Collaboration Revolution

Modern work, indeed, demands seamless teamwork. However, traditional tools often create silos. Documents sit in one place, chat in another. This fragmentation, consequently, slows everyone down. Conversely, Microsoft Loop offers a fresh approach. It is, therefore, a truly game-changing platform. This new tool redefines how teams work together.

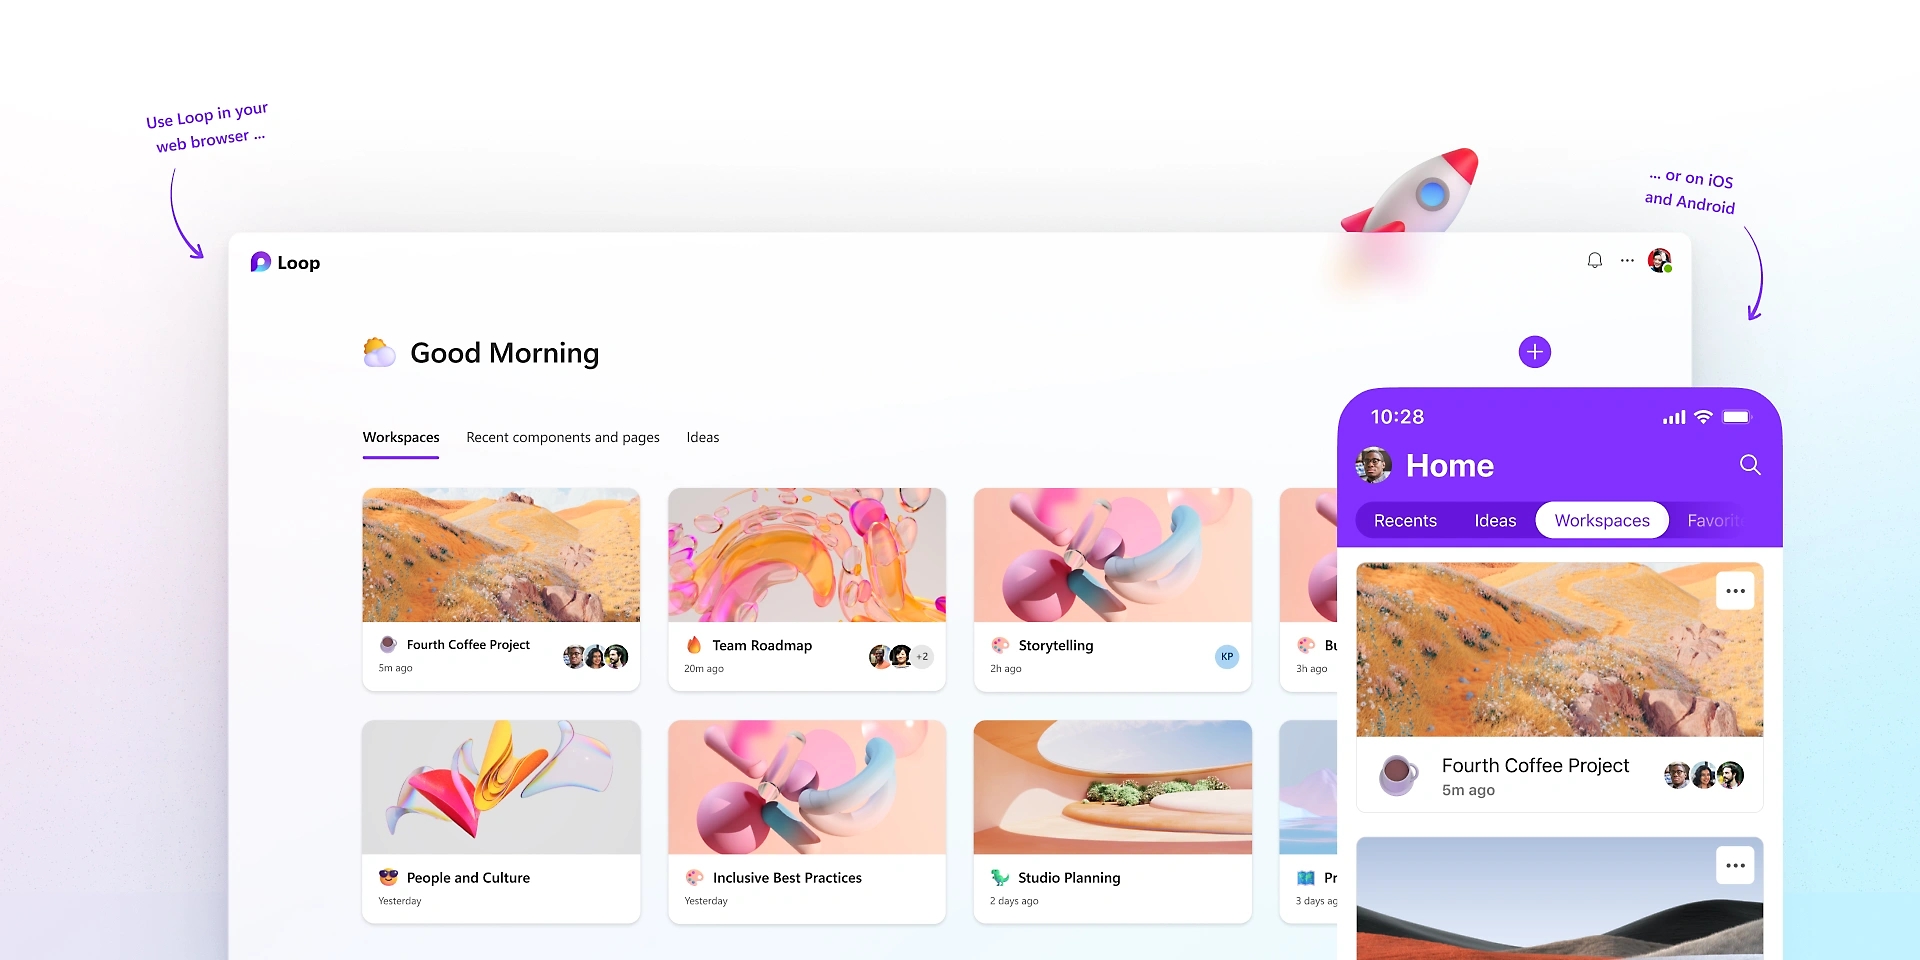
What exactly is Microsoft Loop, then? Essentially, it is a flexible canvas. It combines components, pages, and workspaces. Therefore, it brings content and people into one space. These “Loop components” are key. They are live, portable pieces of content. For instance, a checklist or a table. Furthermore, they sync everywhere instantly. Thus, collaboration becomes fluid and dynamic. This makes teamwork much more efficient.


Understanding Loop Components: The Core Innovation

Loop components are, by and large, the heart of Loop. They are small, interactive elements. You can share them easily across apps. For example, use them in Teams or Outlook. A component might be a paragraph of text. Similarly, it could be a task list for your team. Even a dynamic table can be a component. The magic, however, is their live nature.

Whenever someone edits a component, it updates. This update happens everywhere it exists. Therefore, everyone always sees the latest version. This prevents version control headaches. Furthermore, it eliminates endless email threads. You no longer need to send updated attachments. Instead, changes appear automatically. This makes real-time collaboration truly effortless. Moreover, these components are highly portable. You can copy and paste them freely. They maintain their live sync wherever they go. This allows for incredibly flexible work.


Image of Microsoft Loop

Loop Pages: The Flexible Canvas

Loop pages, consequently, serve as flexible canvases. They are dedicated spaces for thinking. Here, teams can organize all components. A page is, therefore, a place for collective ideas. You can start with a blank page easily. Then, you add various components as needed. For instance, drop in a task list component. Similarly, add a paragraph for notes. You can even include a progress tracker.

These pages are, in fact, highly adaptive. They grow with your project’s needs. You can easily drag and drop elements. Rearranging content is simple and quick. Furthermore, pages support rich media content. Include images, links, or even videos. The goal is to capture all relevant information. This ensures everything stays in one logical place. Therefore, Loop pages create a centralized hub. It consolidates all project assets effectively. This greatly enhances project visibility. Consequently, your team remains perfectly aligned.


Loop Workspaces: Your Project’s Home

Loop workspaces, by the same token, are project homes. They are shared online environments. Here, teams organize all their pages. A workspace, therefore, holds related project content. For example, a marketing campaign needs its own workspace. Similarly, a product development project gets one too. Workspaces bring together all relevant pages. They help group interconnected information together.

Each workspace has its own unique structure. You can customize it for your team. Access control is also managed easily. Decide who can view or edit content. This ensures data security and privacy. Furthermore, workspaces facilitate team oversight. Leaders can quickly see all ongoing projects. They monitor progress across different pages. Therefore, Loop workspaces provide a clear overview. They simplify project management greatly. Consequently, they foster structured, efficient collaboration.


Integrating Loop with Microsoft 365

Microsoft Loop, in fact, integrates deeply. It works seamlessly within Microsoft 365. This integration is a major advantage. Components function across different applications. For instance, use them in Microsoft Teams. You can share a task list in a chat. Your team updates it right there. The changes reflect everywhere instantly. This includes the original Loop page.

Similarly, use components in Outlook emails. Embed a live voting table in a message. Recipients vote directly within the email. Moreover, the results update automatically. This eliminates constant email chains. Furthermore, it streamlines decision-making processes. Loop also connects with Word and OneNote. This ensures content consistency across tools. Therefore, Loop extends the power of 365. It makes all your apps more interactive. Consequently, it creates a truly connected work ecosystem.


Real-Time Co-creation and Feedback

Loop greatly enhances real-time collaboration. It allows multiple users to edit simultaneously. Everyone sees changes as they happen, therefore. This fosters a highly interactive environment. For example, brainstorm ideas together instantly. Each team member contributes their thoughts. The page updates for everyone right away. This accelerates the creative process greatly.

Furthermore, feedback loops become much faster. You can get instant input on content. Colleagues highlight sections for review. They add comments directly to components. These comments are also live and trackable. Therefore, revisions are quick and efficient. This reduces project timelines significantly. Moreover, it ensures all voices are heard. Microsoft Loop makes collaboration truly responsive. It transforms feedback into a fluid conversation. Consequently, it promotes faster project completion.


Use Cases: Where Loop Shines Brightly

Microsoft Loop shines in many work scenarios. Consider project management first. Teams track tasks and progress efficiently. A shared checklist updates for everyone. Deadlines are clearly visible to all. Similarly, it excels in meeting management. Create a live agenda for every meeting. Attendees add notes and action items directly. These updates are accessible afterwards.

Furthermore, brainstorming sessions benefit immensely. Teams co-create ideas on a shared page. Each person contributes to the canvas. No ideas are lost or forgotten. Moreover, content creation becomes truly collaborative. Draft documents or presentations together. Live components ensure everyone works on the same version. Therefore, Loop boosts productivity everywhere. It provides a unified workspace for diverse tasks. Consequently, it solves many common collaboration challenges.


The Future of Hybrid Work with Loop

Hybrid work is the new standard, clearly. Teams work from various locations. They often have different time zones, too. This setup presents unique communication challenges. Microsoft Loop, however, bridges these gaps easily. It creates a persistent, shared workspace. Remote and in-site workers access the same content. They contribute whenever it suits them best.

Live components ensure consistent information. Everyone stays updated, regardless of location. This minimizes misunderstandings and delays. Furthermore, it fosters a sense of inclusion. All team members contribute equally to the project. Their input is visible and valued. Therefore, Loop supports a flexible work culture. It adapts to different schedules seamlessly. Consequently, it strengthens teamwork in any environment.


How Loop Differs from Existing Tools

You might wonder about other tools. How does Loop stand apart, then? It is more than just a document editor. Also, it is more than just a chat platform. Loop combines features from many places. It draws from wikis, documents, and messaging. The key difference is the “live component.” This element is unique to Loop.

Other tools offer real-time editing, certainly. However, their content is often static. It is fixed within one document or app. Loop components are truly portable. They maintain their live state everywhere. This fluidity is a game-changer. Furthermore, the workspace concept is distinct. It organizes pages and components logically. Therefore, Microsoft Loop offers a novel approach. It creates a truly dynamic, interconnected system. Consequently, it provides a unique collaboration experience.


Getting Started with Microsoft Loop

Beginning with Loop is quite straightforward. First, look for Loop in your Microsoft 365. It might be accessible through Teams or Outlook. You can also visit https://www.google.com/search?q=loop.microsoft.com directly. Then, create your very first workspace. Give it a meaningful and clear name. Next, start adding new pages to your workspace. Each page can serve a different purpose.

Finally, begin populating pages with components. Try a simple task list component first. Share it with your team members easily. See how it updates in real time for everyone. Experiment with different component types. Explore the various templates available to you. Therefore, starting small is a great strategy. Gradually integrate Loop into your daily workflow. Consequently, you will discover its true power.


Benefits for Different Roles

Microsoft Loop offers benefits across many roles. Project managers track progress better. They visualize tasks and deadlines clearly. Team leads can foster better engagement. They create spaces for open collaboration. Individual contributors, likewise, gain efficiency. They access all needed information in one place. Developers use it for shared code snippets. Marketers create campaigns with live updates.

Sales teams track client interactions effectively. HR departments manage onboarding processes. Even educators can use it for group projects. Students collaborate on shared assignments easily. Therefore, Loop enhances productivity for everyone. It adapts to specific departmental needs. Consequently, it streamlines workflows for diverse professionals.


The Path Ahead for Microsoft Loop

Microsoft Loop is still evolving, naturally. Microsoft continues to add new features. They listen to user feedback actively. Expect more integrations in the future. It will likely connect with more third-party apps. This will further extend its overall reach. Performance enhancements are also expected. The user experience will only improve over time.

Therefore, Loop represents a significant investment. It shows Microsoft’s commitment to collaboration. The goal is to simplify complex teamwork. It aims to empower hybrid and remote teams. Consequently, Loop will become a cornerstone. It will shape the future of modern work. Thus, it truly is a game-changer for digital collaboration.

Frequently Asked Questions (FAQs)

1. What is the fundamental difference between Loop and OneNote?

OneNote, indeed, is primarily for personal notes. Conversely, Loop is built for dynamic teamwork. Loop’s content is portable and live. For example, a Loop component updates everywhere. OneNote content, however, stays fixed within its own page. Thus, Microsoft Loop offers true cross-app fluidity.

2. Does Loop replace existing Microsoft 365 apps like Teams or Word?

No, not at all, quite the opposite. Loop enhances these other apps. For instance, you use Loop components inside Teams. It brings live content into those conversations. Microsoft Loop is, therefore, a complementary tool. It makes the entire 365 ecosystem more dynamic.

3. Where can I use Loop components currently?

Currently, you can use components in several places. This includes Microsoft Teams chat messages. You can also use them in Outlook emails. Furthermore, you can find them within the main Loop app. Microsoft is constantly adding more locations, however.

4. Are Loop components secure, especially when shared externally?

Yes, Loop components are secure, absolutely. They inherit security settings automatically. This is based on where the component is hosted. Furthermore, sharing is managed through your organization’s settings. Access control is always clearly defined. Therefore, Microsoft Loop maintains robust enterprise security.

5. Can I use Loop if my team members are not on Microsoft 365?

Generally speaking, all editors need a Microsoft account. They need one to access and edit components. However, you can share components with guests. This depends on your specific tenant settings. Microsoft Loop works best within the 365 ecosystem, therefore.

Also Read: The Future of Docs: Google’s Emoji Reactions Explained


AI-Powered Writing in Gmail & Docs

In the fast-paced digital world, writing is a constant task. We write emails, create documents, and draft reports every single day. Therefore, any tool that can make this process faster and more efficient is a game-changer. For years, Google’s Smart Compose has offered simple sentence completions. In contrast, today’s AI-powered writing tools in Gmail and Docs, now powered by the Gemini model, are in a different league entirely. This new evolution moves far beyond simple suggestions. In fact, it provides a truly collaborative writing experience. This is a huge shift, consequently changing how we interact with our digital documents.

Image of AI-Powered Writing in Gmail & Docs

From Autocomplete to a True Co-Author

Smart Compose, originally a clever machine-learning feature, was a great start. It provided predictive text and helped correct grammar. However, it was, at its core, a reactive tool. It simply responded to what you typed. Today’s AI-powered writing is proactive. It can understand the context, purpose, and even the tone of your content. For instance, you can simply write a short prompt like, “Write an email to my team about the upcoming project deadline.” Immediately, the AI will generate a complete, professional draft. This is a significant improvement. It saves you time, of course. It also helps you overcome writer’s block.


Writing with AI in Google Docs: A Seamless Experience

The integration of Gemini into Google Docs offers a powerful new way to write. First, the “Help me write” feature acts as a blank canvas. You just give it a simple command, and it will generate a first draft. Furthermore, it can refine your work with remarkable ease. For example, you can select a paragraph. You can then prompt the AI to “shorten it,” “elaborate on this idea,” or “make it more formal.” This allows you to sculpt your text with a few simple clicks.

In addition, you can use the AI to generate bullet points from a dense paragraph, summarize a long article, or even brainstorm new ideas. Consequently, this makes the writing process more fluid. The AI-powered writing tool is always there, waiting to help you.


AI in Gmail: Mastering Your Inbox

The new AI-powered writing features in Gmail make managing your inbox far more efficient. In fact, it’s a huge time-saver. Consider this: you receive an email. You can now use the AI to draft an entire reply based on the original message. You can, for instance, ask it to “write a reply accepting the meeting invitation” or “draft a polite decline.” The AI understands the context. It can even extract details like names and dates. It then generates a personalized, context-aware response. Furthermore, it can summarize long email threads. This lets you quickly grasp the key points without reading every single message. Therefore, this helps you clear your inbox faster. It also helps you respond more thoughtfully and efficiently.


The Future of Writing is Collaborative

Ultimately, the goal of this AI-powered writing is not to replace human creativity. Instead, it is to enhance it. The AI acts as a smart co-pilot. It handles the mundane parts of writing. This frees you to focus on the more creative aspects. It helps you articulate your thoughts more clearly. It also helps you communicate more effectively. As these tools continue to evolve, they will become more personalized. They will learn your unique style and tone. Consequently, the collaboration will become even more seamless. We are, therefore, moving toward a future where writing is a partnership between human intelligence and AI, creating content that is both faster and better than ever before.


FAQs

1. What is the difference between Smart Compose and the new AI writing features?

Smart Compose provided simple word and sentence predictions. In contrast, the new AI-powered writing features, now based on the Gemini model, can generate entire drafts, rewrite selected text, and summarize content based on a detailed understanding of context.

2. How do I access these new AI features in Gmail and Docs?

These features are now being rolled out to Google Workspace users. You can find them through the “Help me write” button in Docs and through new prompts and options when drafting an email in Gmail.

3. Will these AI tools change my personal writing style?

The AI tools are designed to assist you, not replace you. They can, however, learn from your style. You should always review and edit the suggestions to ensure they align with your voice and intent.

4. Can the AI write about any topic?

The AI can write about a wide range of topics. However, you should use it responsibly. Always verify any facts or information it provides. In addition, avoid using it for sensitive or confidential material.

5. Is my data safe when using these AI writing tools?

Google states that it handles user data with care. It applies its standard data protection and privacy measures to these new AI features.

Also Read: Microsoft 365 Copilot: Complete Guide (2025)

Know More

Logo Copyright and Trademark: What Designers Need to Know

Logo design is a creative process, but it’s also a legal one. It is important for designers to understand the complexity of logo copyrights and trademarks. These legal protections protect the intellectual property rights of designers and clients.

Copyright protects original creative works, including logos, when they are created. As an artist, you own the copyrights of your work unless you grant those rights to the client. This means you have the right to reproduce, distribute, and display your logo, but your client may have restrictions based on your contract.

On the other hand, trademarks protect the brand in the marketplace. Trademarks provide exclusive rights to use logos in relation to specific products or services, making it desirable to register trademarks for logos representing services or products if others do not use similar marks it can cause confusion.

To get through these legal aspects more thoroughly:

Explicit contracts: Clearly define copyright and use rights in your design contracts. Whether the customer or you own the copyright, identify the circumstances under which the customer can use the logo.

Trademark Amendments: Before finalizing the logo, examine the trademark thoroughly to ensure it does not infringe upon existing marks. This avoids legal conflicts down the road.

Register trademarks: Encourage customers to register their logo and trademark. This provides strong protection and a legal recourse against potential infringers.

Maintain records: Keep detailed records of your design plans, notes, and client communications. These can be invaluable in the event of a dispute.

Educate clients: Educate your clients about the importance of protecting their brand with trademarks and the potential risks of not doing so.

In summary, logo copyright and trademark are important elements of the design process. Their understanding helps designers create and protect valuable assets for clients while ensuring legal and ethical responsibilities. By taking these steps, designers can go through the legal process and build strong, lasting relationships with their clients.

Shopify SEO: How to Rank Your Online Store Higher on Google

In the highly competitive world of e-commerce, it is important to rank your online store high on Google to attract organic consumers and increase sales. Shopify, one of the most popular e-commerce platforms, offers a number of tools and features to help optimize your store for search engines. Here are some basic ways to improve your Shopify store’s SEO and boost its Google ranking:

Keyword research: Start by doing thorough keyword research to identify the words and phrases your potential customers are searching for. Use tools like Google Keyword Planner or SEMrush to find the right keywords with the right number of searches and low competition.

Customize product pages: Each product page should have a unique and descriptive title tag and meta description. Include your target keywords naturally in these products. Write compelling product descriptions that not only appeal to customers but also include relevant keywords.

Quality Content: Regularly publish high-quality, informative content about your products or services. Blog posts, shopping guides, and tutorials can attract organic traffic and position your store as an authority in your niche.

Mobile Optimization: Make sure your Shopify store is mobile-friendly. Google puts mobile-responsive websites at the top of its list. Shopify themes are often mobile-optimized, but it’s important to regularly test your store’s mobile performance.

Page Speed: Fast-loading pages are important for SEO. Use tools like Google PageSpeed ​​Insights to identify and fix speed issues. Compress images, enable browser caching, and reduce code to improve load times.

Backlinks: Create high-quality backlinks from popular websites in your industry. Guest posting, collaborating with influencers, and creating shared content can help generate valuable backlinks.

User Experience: Provide a better user experience by establishing a logical order in your store navigation and ensuring ease of access. Fast and secure retrieval systems also contribute to a positive user experience.

Structured data: Use structured data (schema markup) to generate more information about your products for search engines. This can increase your store’s visibility in search results that look great like product snippets.

Regular updates: Update your website and offerings. Search engines want new things, and a dynamic online store likely takes precedence.

Monitor and optimize: Use tools like Google Analytics and Google Search Console to monitor your website’s performance. Analyze data, check keyword rankings, and adjust your SEO strategy accordingly.

In conclusion, ranking your Shopify online store high on Google requires a combination of technological advancement, quality products and an easy-to-use experience. By consistently using these SEO techniques and staying abreast of industry trends, you can improve your store’s visibility and generate more organic traffic, ultimately leading to more sales and acquisition growth for your e-commerce business.

Shopify Shipping: How to Set Up and Optimize Your Shipping Options

Setting up and optimizing your shipping on Shopify is key to running a successful online store. An effective shipping strategy can help attract more customers, boost sales, and improve customer satisfaction. In this guide, we’ll cover how to set up and optimize your shipping on Shopify.

Setting Up Shipping Zones

The first step in organizing your logistics is to set up shipping locations. Delivery locations allow you to define specific distribution locations for your product. To create shipping locations, go to your Shopify dashboard and go to the “Settings” tab. Then select “Shipping and delivery”.

Once you’re in the shipping settings, click “Manage rates” in the area you want to configure. Here, you can add different shipping charges based on factors such as weight, price and destination. Be sure to offer competitive pricing that matches your business needs and goals.

Integrating Shipping Carriers

Shopify offers integration with various shipping carriers including UPS, USPS, and FedEx. This integration simplifies the shipping process and provides real-time shipping costs for your customers. Integrate the shipments, go to the “Shipping and Delivery” option, and select “Manage Integrations.”

Select the shipping carrier you want to work with and follow the program instructions. Once consolidated, these carriers will calculate shipping costs based on package dimensions, destination and shipping method.

Customizing Shipping Options

Tailor your logistics to the specific needs of your business and the expectations of your customers. You can offer different shipping options like standard, express, or next-day delivery. In addition, consider using a free shipping promotion to promote larger orders.

Customization also extends to packaging. Optimize your packaging to reduce shipping costs and environmental impact. Choose the right packing materials and sizes to minimize lateral freight costs and protect your belongings in transit.

Testing and Fine-Tuning

Once your logistics are set, it’s important to test the entire process. Take test orders from a variety of sources and make sure your shipping rates are accurate, and your customers get the service they expect.

Regularly analyze your shipping data to identify any inefficiencies or areas for improvement. You can use Shopify’s built-in analytics or third-party apps to gain insights into your shipping performance. Based on this data, adjust your shipping schedule to optimize cost and delivery time.

In conclusion, organizing and optimizing your delivery on Shopify is essential to the success of your online store. By creating effective sailing areas, and shipping combinations, optimizing strategies, and constantly testing and optimizing, you can improve your’ improve customer shopping experience and grow your eCommerce business.

Web Design for Small Businesses: Tips and Tricks

Having a strong online presence is crucial for small businesses to succeed in today’s digital age. A well-designed website can be a powerful tool for attracting and engaging customers, offering products or services, and building credibility. Here are some important tips and tricks for effective communication that small businesses need.

Understand your audience: Before you get into web design, take the time to understand your target audience. What are their wants, needs and pain points? Modify your website design, content and functionality to suit your specific audience interests and demographics.

Simplicity is key: Keep your web design clean and uncluttered. Simple instructions and a clear layout will help visitors find the information they are looking for quickly and easily. Avoid overloading them with images, pictures, or unnecessary details.

Mobile responsiveness: Make sure your website is responsive to screen sizes and devices. With an increasing number of users accessing websites on mobile devices, mobile-friendly design is essential to ensure a good user experience.

Easy-to-use navigation: Use simple navigation menus and clear fonts to guide users through your site. A user who can’t find what they’re looking for is likely to leave your site, so make navigation a priority.

Content: Content is king. Create engaging and informative content that resonates with your target audience. Use high-quality images and videos to showcase your products or services. Update your content regularly to keep it fresh and relevant.

Branding consistency: Your website should always reflect your brand identity. Use your logo, brand colors and font throughout the site. Consistency helps build brand identity and trust.

Page Speed ​​Optimization: Slow websites can deter visitors. Optimize your website’s performance by reducing image compression, scripts, and speeding up content delivery networks (CDNs).

Call-to-action (CTA) buttons: Encourage users to use strategically placed CTA buttons. Whether it’s “Buy Now”, “Contact Us”, or “Register”, this button should be unique and direct users to desired actions.

Interactive issues: Make it easy for visitors to interact with you. Contact Form Clearly displays your contact information, including a clickable phone number and email address.

Security: Make sure your website and customer data are secure. Use SSL certificates for data encryption, update software and plugins, and backup your website regularly.

Testimonials and reviews: Include customer testimonials and reviews to build trust and confidence. Positive feedback from satisfied customers can influence potential customers to choose your business.

Social Media Integration: Link your website to your social media profiles. This allows visitors to easily follow your business on platforms like Facebook, X and Instagram and extends your online presence.

Analytics: Use Google Analytics and other web analytics tools to track user traffic on your website. This data can help you make informed decisions about system upgrades and content management.

SEO-Friendly Design: Optimize your website for search engines by using the right keywords, creating an XML sitemap, and optimizing meta titles and descriptions. This improves your site’s visibility in search engine results.

Regular maintenance: Requires constant maintenance of websites. Make sure your website is up-to-date, secure, and functional. Check for broken links regularly, update content, and fix any issues immediately.

In conclusion, web design plays an important role in the success of small businesses in the digital age. By understanding your audience, making your website simple and easy to use, and implementing the tips and tricks outlined above, you can create a strong online presence that attracts customers and drives your small businesses. Remember that building a web is not a one-off project but today’s internet It is an ongoing effort to remain relevant and competitive in the marketplace.

The Future of UX/UI: Integrating AI into Website Design

The integration of artificial intelligence (AI) into the ever-evolving field of technology is reshaping the future of user experience (UX) and user interface (UI) design This industry is set to change web design and is committed to improved user experience and easier communication.

The role of AI in UX/UI design extends to different parts of the web development process. One of its key applications is a personalized user experience. AI algorithms can analyze user behavior and preferences in real time, allowing websites to dynamically optimize their interfaces. This personalization process can increase user satisfaction and conversion rates while presenting visitors with products and services they need.

Additionally, AI-powered chatbots and virtual assistants are redefining customer support and engagement. These intelligent bots can instantly provide information, guide users through websites, and solve their queries. This not only enhances the user experience but also makes manpower a more challenging task.

Predictive analytics driven by AI can predict user behavior, making the journey more seamless. By analyzing historical data, AI can suggest appropriate features or products, making decision-making easier for users. This proactive approach ensures that users get what they need quickly, resulting in a seamless and satisfying experience.

AI also plays an important role in accessibility. By automating alt text for images, ensuring compatibility with screen readers, and optimizing layouts for devices, AI-driven design ensures that the website is inclusive and accessible to all individuals, regardless of their power.

However, challenges do arise. Striking a balance between automation and the human touch is important. While AI can customize systems and suggest design elements, it cannot replace human creativity in creating emotionally impactful designs.

In conclusion, the integration of AI into UX/UI design heralds a future in which websites will adapt, engage, and support users in previously unimagined ways. From experiences that are personalized to intelligent assistants, AI is reshaping the digital landscape, promising simpler, more flexible, and efficient interactions eg As designers harness the power of AI, they imagine emphasizing the integration of technological advancement with human-centered design.


Mobile-First Design Approach: Designing for Mobile Devices Initially

A mobile-first design approach is a user-centric approach that prioritizes the design and development of websites or applications for mobile devices before adapting for larger screens, such as desktops or tablets, in the age of mobile ubiquitous users during this kind of recognize the need to create simple, engaging and efficient experiences for users to access content on their smartphones and other small devices which are on screen.

The essence of Mobile-First Design lies in simplicity and functionality. Starting the system with small screen restrictions forces designers to focus on the basics and features that really matter. This simplification ensures that the mobile version is fast and easy, essential and to hold users’ attention and reduce bounce rates.

Technically, mobile-first design typically uses HTML and CSS frameworks to prioritize mobile responsiveness. This approach also aligns with modern SEO strategies, as search engines rank mobile-friendly websites higher on their list.

By adopting a mobile-first design approach, businesses align with the practices of designers and users of today’s digital landscape. Users typically encounter websites or apps on their mobile devices before any other platform. Thus, a positive first impression on mobile greatly impacts overall impressions.

In conclusion, the mobile-first design approach is an intelligent and usability-oriented approach that recognizes the dominance of mobile devices in the digital realm It is not that mobile-first designs provide better user experiences on smaller screens so not only show the development of larger road screen layouts. It’s a way of measuring user needs and behaviors, creating an engaging and inclusive digital environment.

Dropshipping with Shopify: Exploring the World of E-Commerce Opportunity

Dropshipping is a business concept in which the things you sell are not kept in stock. Instead, when a customer orders a product from your store, you purchase it from a third party (usually a wholesaler or manufacturer) and have it shipped directly to the customer. This eliminates the need for inventory storage, packaging, and shipping, making it an attractive option for entrepreneurs.

Shopify is a popular e-commerce platform that makes it easy to set up and manage a dropshipping business. It offers a user-friendly interface, customizable templates, and a range of features tailored for dropshipping businesses.

Here are the key steps to setting up a successful dropshipping store with Shopify:

Select a niche: The first step is to choose a profitable niche for your dropshipping business. Research trends, target audience preferences, and competition to identify a niche with demand and room for growth.

Find reliable suppliers: Once you’ve selected a niche, you need to find reliable suppliers for your products. There are a number of dropshipping supplier directories available online, such as Oberlo and Sprocket. When choosing suppliers, check their reputation, product quality, and shipping policies.

Create your store: Once you’ve found suppliers, you can create your Shopify store. Shopify provides a 14-day free trial so you may try it out before committing to a subscription plan. When creating your store, be sure to choose a relevant domain name, select a suitable theme, and add products to your store.

Optimize your store for conversion: Once your store is up and running, you need to optimize it for conversion. This means making sure your store is easy to use, has clear calls to action, and offers a seamless checkout process. You can also use marketing strategies such as social media advertising and SEO to drive traffic to your store.

Provide excellent customer service: Shopify provides a 14-day free trial so you may try it out before committing to a subscription plan.

This means promptly responding to customer inquiries and concerns, and resolving any issues quickly and efficiently. A positive customer experience can lead to repeat business and positive word-of-mouth.

Dropshipping can be a profitable business model, but it’s important to do your research and plan carefully. By following these steps, you can increase your chances of success.

Here are some additional tips for setting up a successful dropshipping store with Shopify:

  • Use high-quality product images and descriptions.
  • Set competitive prices.
  • Provide free shipping or a flexible return policy.
  • Use social media and other online avenues to promote your store.
  • Keep track of your outcomes and make any required changes to your strategy.
  • You can build a successful dropshipping business with Shopify with hard work and dedication.

Mobile Responsiveness And Website Speed: Finding The Balance

In today’s digital world, it is more important than ever for websites to be mobile-responsive and fast-loading. Mobile devices are now the primary way that people access the internet, and users have come to expect websites to load quickly and smoothly, regardless of the device they are using.

Mobile responsiveness refers to a website’s ability to adapt to different screen sizes and resolutions. This means that the website should look and function properly on smartphones, tablets, and laptops. A responsive website will automatically resize its content and layout to fit the size of the device that it is being viewed on.

Website speed is another important factor that affects user experience. A slow-loading website can be frustrating and annoying for users, and it can even lead to them abandoning the site altogether. In fact, studies have shown that 53% of mobile users will leave a website if it takes more than three seconds to load.

There are a number of things that web designers and developers can do to improve the mobile responsiveness and speed of their websites. Some of these tips include:

Using a mobile-first design approach: This means that the website is designed and built with mobile devices in mind first, and then it is adapted for desktop devices.

Optimizing images and media: Large images and videos can slow down a website, so it is important to optimize them for mobile devices. This can be done by reducing their file size without sacrificing quality.

Prioritizing content: Not all content is created equal. Some content is more important than others for the user experience. Web designers and developers should prioritize the most important content and make sure that it loads quickly.

Using caching and compression techniques: Caching and compression can help to speed up a website by storing certain elements locally on the user’s device. This means that they do not have to be reloaded from the server each time the user visits the site.

Investing in high-quality hosting services: A good hosting provider can help to ensure that a website loads quickly and reliably.

Using a Content Delivery Network (CDN): A CDN is a network of servers that are located around the world. This can help to improve website speed by delivering the content to users from the server that is closest to them.

Testing and monitoring website performance: It is important to regularly test and monitor website performance to ensure that it is meeting the desired standards. There are a number of tools that can be used to do this, such as Google PageSpeed Insights, GTmetrix, and Pingdom.

By following these tips, web designers and developers can create websites that are both mobile responsive and fast-loading. This will improve user experience and lead to increased engagement and conversions.