Refresh loader

Category : Online Course

Home > Archive for Online Course

Microsoft Loop Explained: A Game-Changer for Collaboration

Microsoft Loop: A Collaboration Revolution

Modern work, indeed, demands seamless teamwork. However, traditional tools often create silos. Documents sit in one place, chat in another. This fragmentation, consequently, slows everyone down. Conversely, Microsoft Loop offers a fresh approach. It is, therefore, a truly game-changing platform. This new tool redefines how teams work together.

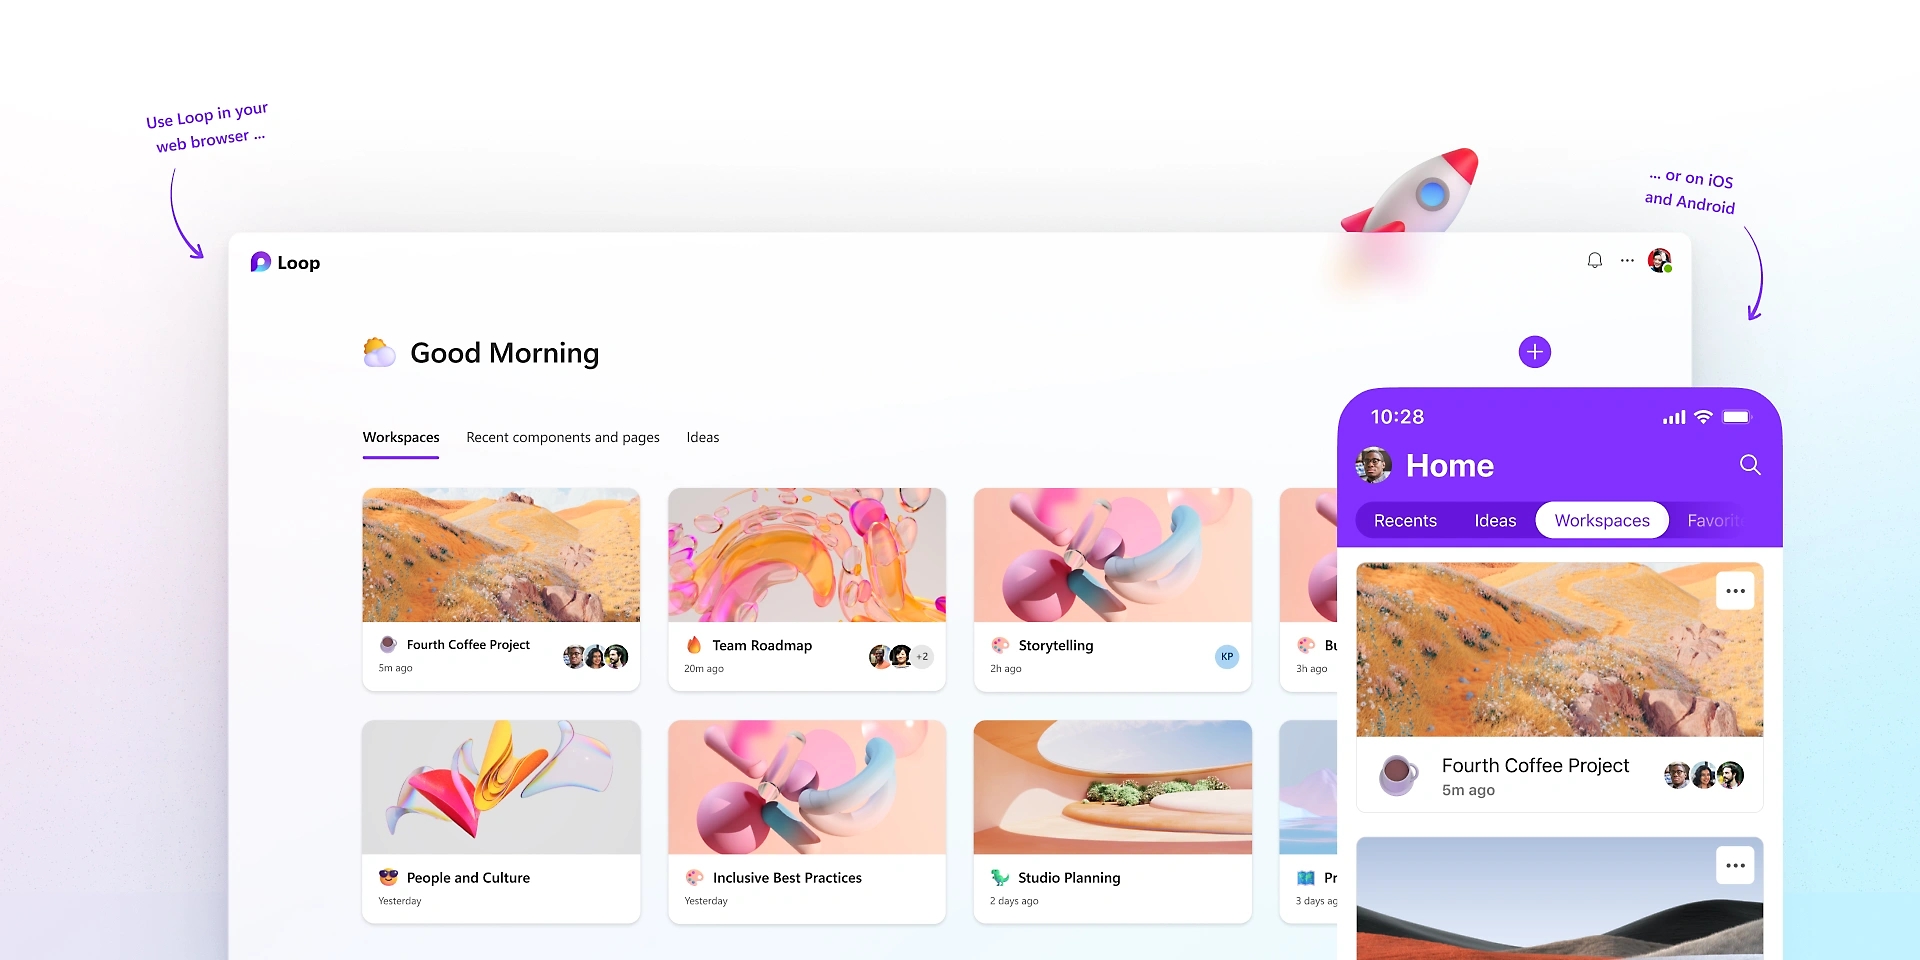
What exactly is Microsoft Loop, then? Essentially, it is a flexible canvas. It combines components, pages, and workspaces. Therefore, it brings content and people into one space. These “Loop components” are key. They are live, portable pieces of content. For instance, a checklist or a table. Furthermore, they sync everywhere instantly. Thus, collaboration becomes fluid and dynamic. This makes teamwork much more efficient.


Understanding Loop Components: The Core Innovation

Loop components are, by and large, the heart of Loop. They are small, interactive elements. You can share them easily across apps. For example, use them in Teams or Outlook. A component might be a paragraph of text. Similarly, it could be a task list for your team. Even a dynamic table can be a component. The magic, however, is their live nature.

Whenever someone edits a component, it updates. This update happens everywhere it exists. Therefore, everyone always sees the latest version. This prevents version control headaches. Furthermore, it eliminates endless email threads. You no longer need to send updated attachments. Instead, changes appear automatically. This makes real-time collaboration truly effortless. Moreover, these components are highly portable. You can copy and paste them freely. They maintain their live sync wherever they go. This allows for incredibly flexible work.


Image of Microsoft Loop

Loop Pages: The Flexible Canvas

Loop pages, consequently, serve as flexible canvases. They are dedicated spaces for thinking. Here, teams can organize all components. A page is, therefore, a place for collective ideas. You can start with a blank page easily. Then, you add various components as needed. For instance, drop in a task list component. Similarly, add a paragraph for notes. You can even include a progress tracker.

These pages are, in fact, highly adaptive. They grow with your project’s needs. You can easily drag and drop elements. Rearranging content is simple and quick. Furthermore, pages support rich media content. Include images, links, or even videos. The goal is to capture all relevant information. This ensures everything stays in one logical place. Therefore, Loop pages create a centralized hub. It consolidates all project assets effectively. This greatly enhances project visibility. Consequently, your team remains perfectly aligned.


Loop Workspaces: Your Project’s Home

Loop workspaces, by the same token, are project homes. They are shared online environments. Here, teams organize all their pages. A workspace, therefore, holds related project content. For example, a marketing campaign needs its own workspace. Similarly, a product development project gets one too. Workspaces bring together all relevant pages. They help group interconnected information together.

Each workspace has its own unique structure. You can customize it for your team. Access control is also managed easily. Decide who can view or edit content. This ensures data security and privacy. Furthermore, workspaces facilitate team oversight. Leaders can quickly see all ongoing projects. They monitor progress across different pages. Therefore, Loop workspaces provide a clear overview. They simplify project management greatly. Consequently, they foster structured, efficient collaboration.


Integrating Loop with Microsoft 365

Microsoft Loop, in fact, integrates deeply. It works seamlessly within Microsoft 365. This integration is a major advantage. Components function across different applications. For instance, use them in Microsoft Teams. You can share a task list in a chat. Your team updates it right there. The changes reflect everywhere instantly. This includes the original Loop page.

Similarly, use components in Outlook emails. Embed a live voting table in a message. Recipients vote directly within the email. Moreover, the results update automatically. This eliminates constant email chains. Furthermore, it streamlines decision-making processes. Loop also connects with Word and OneNote. This ensures content consistency across tools. Therefore, Loop extends the power of 365. It makes all your apps more interactive. Consequently, it creates a truly connected work ecosystem.


Real-Time Co-creation and Feedback

Loop greatly enhances real-time collaboration. It allows multiple users to edit simultaneously. Everyone sees changes as they happen, therefore. This fosters a highly interactive environment. For example, brainstorm ideas together instantly. Each team member contributes their thoughts. The page updates for everyone right away. This accelerates the creative process greatly.

Furthermore, feedback loops become much faster. You can get instant input on content. Colleagues highlight sections for review. They add comments directly to components. These comments are also live and trackable. Therefore, revisions are quick and efficient. This reduces project timelines significantly. Moreover, it ensures all voices are heard. Microsoft Loop makes collaboration truly responsive. It transforms feedback into a fluid conversation. Consequently, it promotes faster project completion.


Use Cases: Where Loop Shines Brightly

Microsoft Loop shines in many work scenarios. Consider project management first. Teams track tasks and progress efficiently. A shared checklist updates for everyone. Deadlines are clearly visible to all. Similarly, it excels in meeting management. Create a live agenda for every meeting. Attendees add notes and action items directly. These updates are accessible afterwards.

Furthermore, brainstorming sessions benefit immensely. Teams co-create ideas on a shared page. Each person contributes to the canvas. No ideas are lost or forgotten. Moreover, content creation becomes truly collaborative. Draft documents or presentations together. Live components ensure everyone works on the same version. Therefore, Loop boosts productivity everywhere. It provides a unified workspace for diverse tasks. Consequently, it solves many common collaboration challenges.


The Future of Hybrid Work with Loop

Hybrid work is the new standard, clearly. Teams work from various locations. They often have different time zones, too. This setup presents unique communication challenges. Microsoft Loop, however, bridges these gaps easily. It creates a persistent, shared workspace. Remote and in-site workers access the same content. They contribute whenever it suits them best.

Live components ensure consistent information. Everyone stays updated, regardless of location. This minimizes misunderstandings and delays. Furthermore, it fosters a sense of inclusion. All team members contribute equally to the project. Their input is visible and valued. Therefore, Loop supports a flexible work culture. It adapts to different schedules seamlessly. Consequently, it strengthens teamwork in any environment.


How Loop Differs from Existing Tools

You might wonder about other tools. How does Loop stand apart, then? It is more than just a document editor. Also, it is more than just a chat platform. Loop combines features from many places. It draws from wikis, documents, and messaging. The key difference is the “live component.” This element is unique to Loop.

Other tools offer real-time editing, certainly. However, their content is often static. It is fixed within one document or app. Loop components are truly portable. They maintain their live state everywhere. This fluidity is a game-changer. Furthermore, the workspace concept is distinct. It organizes pages and components logically. Therefore, Microsoft Loop offers a novel approach. It creates a truly dynamic, interconnected system. Consequently, it provides a unique collaboration experience.


Getting Started with Microsoft Loop

Beginning with Loop is quite straightforward. First, look for Loop in your Microsoft 365. It might be accessible through Teams or Outlook. You can also visit https://www.google.com/search?q=loop.microsoft.com directly. Then, create your very first workspace. Give it a meaningful and clear name. Next, start adding new pages to your workspace. Each page can serve a different purpose.

Finally, begin populating pages with components. Try a simple task list component first. Share it with your team members easily. See how it updates in real time for everyone. Experiment with different component types. Explore the various templates available to you. Therefore, starting small is a great strategy. Gradually integrate Loop into your daily workflow. Consequently, you will discover its true power.


Benefits for Different Roles

Microsoft Loop offers benefits across many roles. Project managers track progress better. They visualize tasks and deadlines clearly. Team leads can foster better engagement. They create spaces for open collaboration. Individual contributors, likewise, gain efficiency. They access all needed information in one place. Developers use it for shared code snippets. Marketers create campaigns with live updates.

Sales teams track client interactions effectively. HR departments manage onboarding processes. Even educators can use it for group projects. Students collaborate on shared assignments easily. Therefore, Loop enhances productivity for everyone. It adapts to specific departmental needs. Consequently, it streamlines workflows for diverse professionals.


The Path Ahead for Microsoft Loop

Microsoft Loop is still evolving, naturally. Microsoft continues to add new features. They listen to user feedback actively. Expect more integrations in the future. It will likely connect with more third-party apps. This will further extend its overall reach. Performance enhancements are also expected. The user experience will only improve over time.

Therefore, Loop represents a significant investment. It shows Microsoft’s commitment to collaboration. The goal is to simplify complex teamwork. It aims to empower hybrid and remote teams. Consequently, Loop will become a cornerstone. It will shape the future of modern work. Thus, it truly is a game-changer for digital collaboration.

Frequently Asked Questions (FAQs)

1. What is the fundamental difference between Loop and OneNote?

OneNote, indeed, is primarily for personal notes. Conversely, Loop is built for dynamic teamwork. Loop’s content is portable and live. For example, a Loop component updates everywhere. OneNote content, however, stays fixed within its own page. Thus, Microsoft Loop offers true cross-app fluidity.

2. Does Loop replace existing Microsoft 365 apps like Teams or Word?

No, not at all, quite the opposite. Loop enhances these other apps. For instance, you use Loop components inside Teams. It brings live content into those conversations. Microsoft Loop is, therefore, a complementary tool. It makes the entire 365 ecosystem more dynamic.

3. Where can I use Loop components currently?

Currently, you can use components in several places. This includes Microsoft Teams chat messages. You can also use them in Outlook emails. Furthermore, you can find them within the main Loop app. Microsoft is constantly adding more locations, however.

4. Are Loop components secure, especially when shared externally?

Yes, Loop components are secure, absolutely. They inherit security settings automatically. This is based on where the component is hosted. Furthermore, sharing is managed through your organization’s settings. Access control is always clearly defined. Therefore, Microsoft Loop maintains robust enterprise security.

5. Can I use Loop if my team members are not on Microsoft 365?

Generally speaking, all editors need a Microsoft account. They need one to access and edit components. However, you can share components with guests. This depends on your specific tenant settings. Microsoft Loop works best within the 365 ecosystem, therefore.

Also Read: The Future of Docs: Google’s Emoji Reactions Explained


AI-Powered Writing in Gmail & Docs

In the fast-paced digital world, writing is a constant task. We write emails, create documents, and draft reports every single day. Therefore, any tool that can make this process faster and more efficient is a game-changer. For years, Google’s Smart Compose has offered simple sentence completions. In contrast, today’s AI-powered writing tools in Gmail and Docs, now powered by the Gemini model, are in a different league entirely. This new evolution moves far beyond simple suggestions. In fact, it provides a truly collaborative writing experience. This is a huge shift, consequently changing how we interact with our digital documents.

Image of AI-Powered Writing in Gmail & Docs

From Autocomplete to a True Co-Author

Smart Compose, originally a clever machine-learning feature, was a great start. It provided predictive text and helped correct grammar. However, it was, at its core, a reactive tool. It simply responded to what you typed. Today’s AI-powered writing is proactive. It can understand the context, purpose, and even the tone of your content. For instance, you can simply write a short prompt like, “Write an email to my team about the upcoming project deadline.” Immediately, the AI will generate a complete, professional draft. This is a significant improvement. It saves you time, of course. It also helps you overcome writer’s block.


Writing with AI in Google Docs: A Seamless Experience

The integration of Gemini into Google Docs offers a powerful new way to write. First, the “Help me write” feature acts as a blank canvas. You just give it a simple command, and it will generate a first draft. Furthermore, it can refine your work with remarkable ease. For example, you can select a paragraph. You can then prompt the AI to “shorten it,” “elaborate on this idea,” or “make it more formal.” This allows you to sculpt your text with a few simple clicks.

In addition, you can use the AI to generate bullet points from a dense paragraph, summarize a long article, or even brainstorm new ideas. Consequently, this makes the writing process more fluid. The AI-powered writing tool is always there, waiting to help you.


AI in Gmail: Mastering Your Inbox

The new AI-powered writing features in Gmail make managing your inbox far more efficient. In fact, it’s a huge time-saver. Consider this: you receive an email. You can now use the AI to draft an entire reply based on the original message. You can, for instance, ask it to “write a reply accepting the meeting invitation” or “draft a polite decline.” The AI understands the context. It can even extract details like names and dates. It then generates a personalized, context-aware response. Furthermore, it can summarize long email threads. This lets you quickly grasp the key points without reading every single message. Therefore, this helps you clear your inbox faster. It also helps you respond more thoughtfully and efficiently.


The Future of Writing is Collaborative

Ultimately, the goal of this AI-powered writing is not to replace human creativity. Instead, it is to enhance it. The AI acts as a smart co-pilot. It handles the mundane parts of writing. This frees you to focus on the more creative aspects. It helps you articulate your thoughts more clearly. It also helps you communicate more effectively. As these tools continue to evolve, they will become more personalized. They will learn your unique style and tone. Consequently, the collaboration will become even more seamless. We are, therefore, moving toward a future where writing is a partnership between human intelligence and AI, creating content that is both faster and better than ever before.


FAQs

1. What is the difference between Smart Compose and the new AI writing features?

Smart Compose provided simple word and sentence predictions. In contrast, the new AI-powered writing features, now based on the Gemini model, can generate entire drafts, rewrite selected text, and summarize content based on a detailed understanding of context.

2. How do I access these new AI features in Gmail and Docs?

These features are now being rolled out to Google Workspace users. You can find them through the “Help me write” button in Docs and through new prompts and options when drafting an email in Gmail.

3. Will these AI tools change my personal writing style?

The AI tools are designed to assist you, not replace you. They can, however, learn from your style. You should always review and edit the suggestions to ensure they align with your voice and intent.

4. Can the AI write about any topic?

The AI can write about a wide range of topics. However, you should use it responsibly. Always verify any facts or information it provides. In addition, avoid using it for sensitive or confidential material.

5. Is my data safe when using these AI writing tools?

Google states that it handles user data with care. It applies its standard data protection and privacy measures to these new AI features.

Also Read: Microsoft 365 Copilot: Complete Guide (2025)

Know More

10 Steps to Make Online Course Successful

Gone are the days where you might just ‘promise’ the opportunities in which you’re worth spending–now you’ve got to show. So, there is no better way to show your skills than by bringing together an online tutorial.

By teaching your subject you leave no shadow of a doubt that you know what you’re talking about, are excellent at what you’re doing and are an authority in your profession. As a website and business card, the online course is now as important to the toolbox of any developer, specialist, or opinion leader. One of the fastest and most impactful ways of getting your knowledge to a global marketplace, making a bigger impact, and making more money, is to download that knowledge dormant in your brain and turn it into a lead-generating, cash-making, impact-creating course online.

In this article, you will find an overview of the 10 major stages of the creation of online courses

While this is by no means an exhaustive list of all the items that need to be scheduled, prepared for and performed in order to build a good online course, it gives you the ‘stratospheric outline’ of the big milestones so you know what to expect and what the trip would look like before you start.

Pick the subject of the Ideal Course

The subject of the course needs to be something you enjoy. If you’re not passionate about your topic, it’ll be obvious if you don’t like your topic and make your workout as engaging as a sandwich in cardboard.

Don’t sound like you are going to have to teach a trade at the university level. Talk about the skills, strengths, and life experiences you’ve been through. Cooking your dream meals, interior decor, writing non-fiction, surviving a loved one ‘s death… the list of potential subjects for the course is infinite. In short, if you enjoy the subject, you ‘re good at it and you have the expertise (formal or life) in it, then you’ve got a subject that’s going to work for you.

Related Post: Things To Do For Secure Mobile Payment.

Ensure that the proposal for the course has strong business appeal

Hands up who wants to waste weeks of their lives designing an online course, with nobody to buy it at all? None. I didn’t believe it.

When you have chosen the subject for the online course, the next move is to run a variety of market research studies to determine if or not it has a business demand. Many course designers make the mistake of assuming that if there is a lot of competition in their field of the subject, then their idea, of course, does not fly. But in addition, this indicates that there is a high possibility that there will be good consumer demand for that concept of course, and perhaps worth more investigating.

The three main things to be checked for are:

  1. Were they thinking about it?
  2. Were people asking questions?
  3. Is there a gap in what that competition offers?

If the reaction to the three questions above is ‘yes’ and the idea is close but different from what’s currently out there, then you have an idea of course that has a chance of becoming a best-seller.

Render learning outcomes magnetic and convincing

Don’t underestimate the importance of the effects of research. When you don’t do that with your online classes, your image and your bottom line could be severely compromised–let alone making the course design process stressful.

Would you hand over your money to someone you don’t understand for a product, and have no idea what it’s going to do for you? Clearly not.

Just because you know what your course is going to give your students it doesn’t mean they’re going to know. If your students don’t know HOW your course can benefit them, they can definitely not participate in it. Training results simply illustrate what the learner will do, experience, and understand at the conclusion of the lesson, use observable verbs. Which skills would they really demonstrate? What new insight did they gain? What emotions are they shifting away from or to? Clear learning results also ensure that only RIGHT students join your course – which means higher completion and satisfaction rates, and lower requests for a refund.

Pick and compile material for your Course

It is the stage when many course designers are starting to fear to slip down ‘Eternal Procrastination Trap.’    

The biggest reason we get stuck here is mostly due to the sheer amount of information we have in our minds or in books, on our hard drives, in our notepads, and so on all around us. At this point, art is not only about what we should include in our course, but what items we can leave out. It is where the work you’ll be doing in the business review process and the learning outcomes come to serve you again now. As you sort through your piles of content, throw away anything that is not directly related to a learning outcome. Second, ensure that every learning result is consistent with content. Only include content that responds to burning questions from your audiences, or fills out gaps that your competitors have not met.

Structure your Course and Modules

That is the stage where you now take a look at all of your material and start organizing the common topics, suggestions, and insights into modules and then arrange the lectures within those modules in the most inclusive and rational way so that they form a fluid series of lessons.

Determine the safest and most efficient methods of implementation for every lesson

It is now time to focus on how best to produce your content. You ought to be mindful of the various other learning values, learning styles, and all the different ways you can implement the training and make sure the training is as enjoyable as possible.

Are you going to have videos, reading content, audio content, activities? Which sort of graphics do you want to have? Were you going to have places in Group learning? You ought to ensure that you have a combination of visual, auditory, and realistic methodologies so that everyone is interested and has the best learning opportunity possible.

Filming, capturing and editing the classes online             

This is the Process of Development. Around now, you will have a detailed course schedule, all of your material together and know exactly how each aspect of your online course will be presented.

This is the time for the fun aspect-to get on tape. For example how you execute your teaching depends largely on what the client wants to engage with, and which approach more successfully achieves the learning outcomes.

The most powerful form of distribution at present, however, is film. This could be ‘talking head’ footage when you’re on camera in the picture. You would also be able to get ‘black screen’ talking head videos.

This means that you are recording behind you with a green background-where you have a green screen, during the editing process you can have anything behind you. It could be a picture, cartoons, or even a still image, behind you. I use the green screen to get my PowerPoint presentations in the post-editing process that’s perfect for my classroom style preparation.

Another approach is called screencasting, which is where you film your computer screen–you may opt to add a screenshot of your own form of camera on top of it. You can very quickly learn how to edit the videos yourself. It helps you to easily delete editing and replace your green screen, correct your sound, apply icons, text and pop-ups, and your videos; save them as an mp4 and then upload them to your learning network online.

Create your Online School

The first thing to remember here is that there are three big ways of marketing the courses online.

  1. Digital marketplaces for course
  2. Learning Management Systems
  3. Plugins on your website, or apps.

Your own Academy is a learning management program that you can connect to your website and totally market as your own channel. It makes the production of the learning items online fast and quick to sell.

My choice is Thinkific (I’m running all of my courses on this platform), so if you’re already early in the discovery process, here’s a rundown of all the items you should be searching for in an LMS (Learning Management System).

Having the right price strategies and tapping into a business model focused on greater knowledge

Assure that you have strategized how and where your online course will fit into your business model as a whole.                                                   

Each of these will mean that your course needs to be slightly different in design, provide a different volume of value, have different marketing methodologies, and put your followers and students into very different types of funnels. It would also have a huge effect on the price you choose to add to your online course so that it suits the role it is offered within your company properly.

There is no right or wrong price for an online course, or even recommendation quality because it depends so much on what you offer. But as a starting point, my advice is to evaluate and compare your proposal against competing goods in the marketplace –take a look at what your rivals are paying for and selling, and then figure out how good and better yours could be. Once you have improved yours, the quality of mine would be marginally higher instead. Never lower the price because that’s only going to make it look like it has less worth than the rivals.

Related Post: How To Make Your Online Meeting More Engaging?

Release and Campaign Continuing

If you think the job is done now that you’ve finished your course online, think again now that the real work is off! Too many course designers make the mistake of assuming that they will now have an income stream after their course is developed. To advertise your course and recruit students, you need to launch and continuing marketing campaign.

  • Can you run discount deals on early birds?
  • Will you have a marketing campaign for content and will sell your courses online?
  • Would you want to run ads?
  • Have you got a list to market for?
  • Can you partner with those influencers?
  • Will you want to run an affiliate program?
  • How are you going to use these social media?

And the list goes on….

Be sure you have a marketing strategy for your online course for at least 18 months, and note that the second you quit promoting is the second one you quit offering.

Conclusion

So, there you have it-a ‘birds-eye-view’ of the big milestones in the development of online course!

Hopefully, these steps will give you a clear sense of what to expect from your online course design and marketing path.