Refresh loader

Category : Gmail

Home > Archive for Gmail

Is scaling your brand via Workspace better than free Gmail?

In today’s fast-paced digital world, businesses need the right tools to thrive. Many small businesses start with free Gmail accounts. However, as they grow, these free tools often fall short. Because of this, upgrading to Google Workspace is a game-changer. It offers advanced features, better security, and a professional look. For instance, this move is not just an expense. In fact, it is a smart investment.

The Limitations of Free Gmail for Businesses

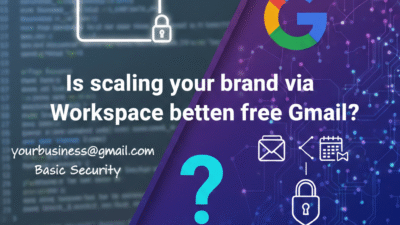
Free Gmail is great for personal use. However, it has many limits for business. First, your email address looks unprofessional. Specifically, an email like yourbusiness@gmail.com lacks trust. Furthermore, free Gmail has fewer storage options. You also miss out on shared calendars. Similarly, collaborative documents are not as powerful. Security features are also very basic. This puts your business data at risk. In contrast, Google Workspace solves all these issues. Indeed, it is a necessary step for serious operations.

Is scaling your brand via Workspace better than free Gmail?

Google Workspace: More Than Just Email

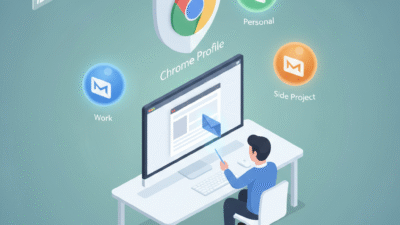
Google Workspace offers a full suite of apps. It includes Gmail, Calendar, Drive, and Docs. Additionally, you get Meet for video calls and Chat for team messages. All these tools work together seamlessly. Therefore, your team can collaborate easily from anywhere. For example, you can edit a document with a teammate in real-time. Files save automatically to the cloud. Thus, you never lose work. It truly boosts team productivity every day.

Enhanced Security and Control

Security is a major concern for any business. Free Gmail offers standard security. Google Workspace, however, provides advanced protection. For example, it has stronger spam filters. It also uses data encryption. You also get admin controls. This allows you to manage user access and device security. For instance, you can wipe data from lost phones. Plus, you get 24/7 support. This keeps your business safe from threats. Your data and reputation are too important to risk.

Professional Branding with Custom Email

A custom email address makes your business look professional. Imagine yourname@yourcompany.com. This builds trust with clients. Similarly, it reinforces your brand identity. Google Workspace makes setting this up very easy. For instance, you can create multiple email aliases for different roles. Consequently, this presents a unified front to the world. Indeed, first impressions truly matter in the business world.

ROI Example 1: Increased Productivity

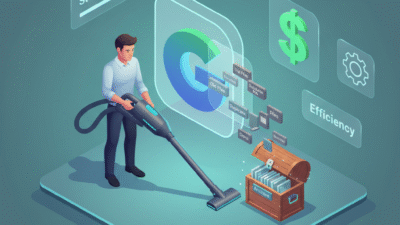
Let’s look at a small team of 5 people. Each person wastes 30 minutes a day on basic tasks. This includes finding files or dealing with email issues. This totals 2.5 hours lost per day. Over a month, that is 50 hours. If an employee’s wage is $20 per hour, that is $1,000 lost monthly. With Google Workspace, team collaboration saves time. For example, shared docs and smart search cut down wasted time by half. Therefore, you save $500 per month.

ROI Example 2: Better Security Prevents Costly Breaches

A data breach can cost a small business thousands. In fact, it can even lead to closure. Studies show average breach costs are very high. Imagine a breach costs your business $5,000. Google Workspace’s advanced security reduces this risk greatly. By spending a small amount on Workspace, you protect against huge losses. This is like buying insurance for your data. Furthermore, the peace of mind is worth it. It is a smart move for your future.

ROI Example 3: Scalability and Future Growth

As your business grows, your needs change. Google Workspace scales with you. For instance, you can easily add new users. Similarly, storage can expand as needed. New features roll out regularly. This ensures your tools stay modern. Therefore, you will not outgrow your software. This long-term thinking saves money and effort. Consequently, you avoid changing systems later. It sets a strong foundation for future success.

Invest in Your Business’s Future

Choosing Google Workspace is a strategic decision. It is about more than just email. It is about security, collaboration, and professional image. The clear ROI examples show its value. Small businesses that upgrade gain a competitive edge. Therefore, they work smarter and not harder. They protect their data and build trust. Make the switch today and watch your business thrive.


FAQs

1 Why should I pay for Workspace if Gmail is free?

Professional email and better security are worth the cost. Therefore, your business looks more trustful.

2 Can I keep my old emails when I move?

Yes, Google has tools to move your old mail. Consequently, the transition is very easy.

3 Is Workspace safe for my business data?

Yes, it has advanced encryption and admin controls. Thus, your data stays very safe.

4 What if my team is very small?

Even a team of one benefits from a custom domain. For instance, it builds your brand fast.

5 Is it hard to set up Workspace?

No, the setup is very simple and fast. Furthermore, Google offers 24/7 help.

Read More:

Will New Workspace Rules Help Your Team Scale?

Why Gmail Blocks Your Emails and How to Fix It Easily

Restore Deleted Google Workspace Users With This Simple Hack

Restore Deleted Google Workspace Users With This Simple Hack

Losing critical employee data due to an accidental deletion can feel very stressful because your entire business operation relies on those files. However once you learn the proper way to restore deleted Google Workspace users you will see how easy it is to recover your lost information. I have used these exact methods to help IT admins reverse costly mistakes while seeing zero data loss for their organizations.

The Problem With Accidental Deletion

Many admins feel a sense of panic when a user account disappears because they assume the data is gone forever. This approach creates a massive amount of unnecessary pressure on your internal support team. You might feel frustrated when you realize that important emails and drive files are no longer accessible to your staff. To restore deleted Google Workspace users you must act quickly before the system purges the files forever.

The solution lies in acting quickly within the standard recovery window provided by Google. The admin console allows you to bring back a deleted user and all their associated data if you follow the right path. Once you apply these recovery steps you will see your workspace return to its normal state. I have seen companies save hundreds of hours of work by knowing the right process to restore deleted Google Workspace users.

Restore Deleted Google Workspace Users With This Simple Hacks

Step 1: Verify the Twenty Day Recovery Window

Google only allows you to restore deleted Google Workspace users within twenty days of the initial deletion. Specifically you must check the date the account was removed to ensure you are still within this vital timeframe. If you wait longer than twenty days the data is purged from the system permanently. Therefore your first priority is to confirm that you can still take action.

Step 2: Access the Users Section in Admin Console

You should log in to your Google Admin console using an account that has super admin privileges. Once you are inside navigate to the directory section and select the users option from the sidebar. This area contains all the tools you need to manage your employee accounts. This simple navigation is the starting point for every mission to restore deleted Google Workspace users.

Step 3: Use the Recently Deleted Filter

The default view only shows active users so you must change your settings to find the missing account. You can click on the add a filter option and select the recently deleted category from the list. This will reveal every account that has been removed within the last three weeks. To restore deleted Google Workspace users you simply need to find the specific name in this list.

Step 4: Review the User Data Before Restoration

Before you click the restore button you should double check the user’s details to avoid any confusion. For instance you want to make sure you are recovering the correct person if you have multiple employees with similar names. This ensures that you do not waste time while you restore deleted Google Workspace users. Consequently you maintain a clean and accurate directory for your entire business.

Step 5: Check for Available License Seats

Google Workspace requires an active license for every user you want to have in your system. If your current plan is full you may need to buy an extra seat before you can complete the restoration. You should check your billing section to see if you have any unassigned licenses ready to go. Having a license ready ensures that you can restore deleted Google Workspace users without any technical errors.

Step 6: Click the Restore Button

Once you have selected the correct user simply hover over their name and click the restore link. A pop up window will appear asking you to confirm that you want to bring the account back to life. This action triggers the system to begin reassembling the user’s emails and drive files. Therefore you are just one click away from the goal to restore deleted Google Workspace users.

Step 7: Assign the User to an Organizational Unit

You must decide where the restored user fits within your company structure to ensure they have the right permissions. For example you might need to place them back into the sales or marketing department. This step ensures that the user can immediately access the shared folders they need for their job. Proper placement keeps your security policies consistent when you restore deleted Google Workspace users.

Step 8: Reset the User Password for Security

As a safety measure you should always create a new password for any account that has been restored. Specifically this prevents any old credentials from being a weak point in your company security. You can send the new login details directly to the employee or their manager. Prompt password resets are a primary way to keep your business data protected.

Step 9: Verify Google Drive and Gmail Content

After the restoration is complete you should ask the user to check their most important files and emails. Because the system can take up to twenty four hours to fully sync you might see some items appearing slowly. This verification step ensures that every piece of vital information has returned to its original home. You should see all their previous work restored exactly as it was before the deletion.

Step 10: Set Up an Ownership Transfer Policy

To avoid future deletion scares you should implement a policy for transferring file ownership. For instance when an employee leaves you can move their drive files to a manager before deleting the account. This ensures that the business keeps the data even if the individual user is gone. Taking this proactive step is the smartest way to manage your digital assets.

Conclusion and Next Steps

If you follow the steps in this guide you should soon see your deleted users back in your directory. Please do not forget to let me know how you got on in the comments below. I am always interested in hearing your thoughts so tell me which part of the recovery process you felt was most helpful.

FAQs

1 How long do I have to restore a deleted user?

You have exactly twenty days from the date of deletion to recover a user and their data.

2 Do I lose emails when a user is deleted?

If you restore the account within twenty days all emails and files will return to the user.

3 What if the twenty day window has passed?

Once twenty days have passed the data is permanently deleted and cannot be recovered by Google.

4 Do I need a super admin account to do this?

Yes only a user with super admin privileges can restore deleted accounts in the console.

5 Can I restore multiple users at once?

You can select multiple names from the recently deleted list and restore them as a batch.

Also Read: Top 10 Admin Console Mistakes That Are Hurting Your Business Right Now

How to reduce Google Drive storage costs in 5 minutes

You must act fast to stop wasting money on unused cloud space in the digital world today. Therefore, you should learn how to reduce Google Drive storage costs with smart file management. Truly, a cluttered drive is a direct drain on your company’s monthly budget. Consequently, you can grow your profit by cleaning up your digital files for 2026.

Many people think that buying more storage is the only way to fix a “Drive Full” alert. But, the reality is that better habits can save you hundreds of dollars every year. Always remember, an organized drive is a strong signal for any search engine. This ensures that your brand stays efficient and your team stays very productive. This approach requires you to audit your files for duplicates and old data today. It helps you build a much more sustainable business for the long term. It makes your daily digital operations feel much more secure and very effective.

Google Drive storage


Finding and Removing High-Storage Leaks

First, you must identify which files are taking up the most space right now. Why does your drive feel full even if you do not have many documents? Clearly, large video files and high-res images are the most common culprits in 2026. Therefore, you must use the built-in storage tools to find these leaks today.

Steps to Identify Heavy Files

Here are several ways to spot storage hogs in your Google account:

  • Quota View: Go to drive.google.com/drive/quota to see files sorted by size.

  • Search Operators: Use larger:10M in Gmail to find emails with big attachments.

  • Media Audit: Look for old webinar recordings or raw video footage you no longer need.

  • Hidden App Data: Check your “Manage Apps” settings for data left by third-party tools.

  • Duplicate Detection: Use tools like Filerev to find 100% identical copies of files.

  • Shared With Me: Remember that files shared with you do not count against your limit.

  • Search Engine Value: Faster file access improves your overall brand efficiency score.

Truly, these steps solve the problem of a full drive in just a few minutes. But, you must also remember to empty your “Trash” folder to permanently free up the space. This keeps your billing accurate and prevents any sudden price hikes for your firm. It creates a very high and professional standard for your daily cloud management.


Mastering Pooled Storage in Google Workspace

So, how do you make the most of the storage you already pay for in 2026? Truly, modern Workspace plans use “Pooled Storage” to share space across your whole team. Consequently, you should learn how to balance the load between heavy and light users. It acts as a direct way to avoid upgrading to a more expensive plan.

Using Pooled Storage to Save Money

Here is how you can manage your team’s space to keep costs low right now:

  1. Storage Limits: Set individual quotas for each user to prevent any one person from hogging space.

  2. Shared Drives: Move project files to Shared Drives so they belong to the team, not a person.

  3. Light User Credit: Use the extra space from light users to cover your heavy content creators.

  4. Retention Policies: Set rules to auto-delete old drafts after a certain number of years.

  5. Ownership Transfers: Transfer files from departing employees to a single archive account.

  6. Annual Audits: Review your total storage use once a year to stay under your plan’s cap.

  7. Trust Rankings: A well-managed workspace helps you keep a top search engine rank.

Furthermore, this improves your search engine performance by showing your firm is smart. It makes your company look very professional and ready for 2026 digital shifts. This ensures that you only pay for the storage your team actually needs. It creates a very fast and clear path for your professional digital success.


Moving Data to Lower-Cost Storage Tiers

The third phase involves finding a cheaper home for files you must keep but rarely use. Clearly, keeping “Cold Data” in your active Google Drive is very expensive today. Therefore, you should use “Google Cloud Storage” for your long-term archives in 2026.

Using Archive Classes for Huge Savings

Firstly, identify project folders that have not been touched in over six months. This allows you to move them to “Coldline” or “Archive” storage classes right away. Secondly, use automation tools to move these files based on their “Last Modified” date.

Furthermore, use transition words in your archive guides to help your team find old files. Also, remember that a lean main drive helps your search engine authority and site speed. Lastly, check if your “Cloud Partner” offers a discount for long-term data storage. Truly, a tiered plan is the best tool for saving money on massive data sets. It allows you to keep every important record without paying the high “Drive” price. This is why top IT admins are moving toward “Lifecycle Management” right now.


Measuring Your Digital Cleanup Success

The fourth phase is where you track if your new habits are actually saving you money. Clearly, you must know if your “Storage Bill” is going down or staying flat in 2026. Therefore, you must use the “Google Admin Reports” to see your trends every month.

Metrics for a Cost-Effective Drive

Firstly, track the “Total Storage Used” to ensure you stay within your plan’s free limit. This helps you avoid “Auto-Upgrade” fees that can double your bill today. Secondly, calculate the “Cost Per Terabyte” to see if your archive strategy is working.

Furthermore, look for any “Inactive Users” who are still taking up a paid license and space. Also, use your data to see if a cleaner drive leads to a higher “Team Productivity” score. Lastly, check your search engine ranking to see if better data health helps your traffic. Truly, a lean path is a journey that leads to a much stronger brand. It turns a messy cost into a series of smart, secure wins for your whole team. This ensures your business stays strong while others face high cloud costs.


Maintaining a Lean Workspace

Finalizing your plan requires you to build a culture of “File Minimalism” in your team. It needs you to set clear rules for naming, storing, and deleting files every single day. Clearly, staying under your storage limit is a team effort for your brand in 2026. Therefore, follow these simple tips to keep your workspace safe and very fast.

Simple Tips for Lifelong Storage Success

Firstly, host a “Digital Cleanup Day” once every six months for your whole staff. This helps everyone find and delete old drafts and large video recordings today. Secondly, encourage your team to use “Shortcuts” instead of making copies of files.

Furthermore, use transition words in your tech updates to keep the message very clear. Also, remind your team that a fast drive helps the company earn more search engine trust. Lastly, check your search engine data to see if your stability helps your web traffic grow. Truly, a safe path is a journey that leads to a much better brand in 2026. It builds a path of profit that lets your whole team grow very fast. This secures your future in the digital world for a long time.


Frequently Asked Questions (FAQs)

Q1: Does Google charge for files in the Trash?

Yes, files in the Trash count against your storage until you empty the folder permanently.

Q2: What is the best way to find my largest Google Drive files?

You can visit drive.google.com/drive/quota to see a list of your files sorted by size.

Q3: Do files in “Shared with me” use my storage space?

No, shared files only count against the storage limit of the person who owns them.

Q4: Can I set storage limits for individual users in my team?

Yes, Google Workspace admins can set specific storage quotas for different users or groups.

Q5: Will deleting my old emails free up Google Drive space?

Yes, because Google Drive, Gmail, and Google Photos all share the same pooled storage.

Also read: How to fix Google Workspace billing issues

How to master Gmail not loading repairs like a pro

You must have a working email to stay connected in the world today. Therefore, you should learn how to fix Gmail when it refuses to load. Truly, a spinning loading icon is one of the most annoying digital hurdles. Consequently, you can get back to work by following a few simple repair steps for 2026.

Many people think that a loading error means the whole Google system is down. But, the reality is that the problem usually lives on your own device. Always remember, a fast and responsive inbox is a strong signal for any search engine. This ensures that your brand stays professional and your replies stay very timely. This approach requires you to check your browser, your app, and your connection. It helps you build a much more reliable digital life for the long term. It makes your daily communication feel much more secure and very effective.

master Gmail not loading repairs


Phase 1: Fixing Gmail Loading Issues on Desktop

First, you must look at your web browser to see what is blocking the page. Why does Gmail sometimes get stuck on the “Loading” bar for several minutes? Clearly, a cluttered browser cache is often the main reason for this delay. Therefore, you must clear your temporary files to give Gmail a fresh start.

Quick Fixes for Your Web Browser

Here are several ways to fix Gmail on your computer in 2026:

  • Clear Cache and Cookies: Go to your browser settings and wipe your history today.

  • Disable Extensions: Turn off ad-blockers or script-trackers that might block Google.

  • Use Incognito Mode: Open a private window to see if Gmail loads without add-ons.

  • Update Your Browser: Ensure you are using the 2026 version of Chrome or Edge.

  • Check Internet Speed: Run a quick test to see if your Wi-Fi is strong enough.

  • Toggle Offline Mode: Disable the “Offline Mail” setting in your Gmail account.

  • Trust Scores: A clean browser helps you maintain a better search engine reputation.

Truly, these steps solve almost every desktop loading problem in a few seconds. But, you must also ensure that your antivirus is not being too strict. This keeps your inbox safe and prevents any sudden blocks in your workflow. It creates a very high standard for your daily digital operations.


Phase 2: Solving Gmail App Errors on Mobile

So, what happens if the Gmail app on your phone is the one acting up? Truly, mobile apps can sometimes get “tangled” after a big software update. Consequently, you should focus on the app settings to restore your mobile mail. It acts as a direct fix for your Android or iPhone email troubles.

How to Restore Your Mobile Gmail App

Here is how you can fix a stuck Gmail app in 2026:

  1. Force Quit the App: Swipe the app away and open it again for a fresh sync.

  2. Clear App Cache: Go to your phone settings and delete the temporary Gmail data.

  3. Check for Updates: Visit the Play Store or App Store for the latest 2026 patch.

  4. Review Storage: Ensure your phone has enough free space to download new mail.

  5. Re-add Your Account: Remove your Google account and sign back in to reset.

  6. Check Data Limits: Ensure your phone is not restricting data use for the app.

  7. Sync Reliability: Fast mobile sync helps you earn more search engine trust.

Furthermore, this improves your search engine performance by showing you are a mobile-ready pro. It makes your company look very responsive and ready for 2026 tasks. This ensures that you never miss a vital note from your team or clients. It creates a very fast and clear path for your professional growth.


Phase 3: Dealing with Account and Server Sync Issues

The third phase involves looking at the Google servers and your account health. Clearly, you cannot fix a problem if the error is on Google’s side of the fence. Therefore, you should check the official status of the Workspace servers today.

Verifying the Health of Your Account

Firstly, visit the Google Workspace Status Dashboard to see if a global outage exists. This allows you to know if you just need to wait for a fix. Secondly, check if your Google account storage is completely full in 2026.

Furthermore, remember that Google is ending POP support for third-party mail this year. Also, ensure your IMAP settings are on if you use an app like Outlook. Lastly, remember that a healthy account helps your search engine authority and user speed. Truly, knowing the “why” behind a loading error saves you a lot of stress. It allows you to focus on other tasks while Google fixes their own bugs. This is why top pros check the status page first every time.


Phase 4: Troubleshooting Advanced Connection Blocks

The fourth phase is where you look at your network and hardware firewalls. Clearly, some office or public Wi-Fi networks block Google for security reasons. Therefore, you must test your connection on a different network to be sure.

How to Bypass Network Loading Walls

Firstly, try switching from Wi-Fi to mobile data on your phone right now. This helps you see if your router is the one causing the loading loop. Secondly, restart your modem and router to clear any old data paths.

Furthermore, check if your VPN is slowing down your connection to Google’s servers. Also, use simple words in your IT requests if you need help at the office. Lastly, check your search engine ranking to see how network speed helps your site. Truly, a flexible connection is your best tool for staying online in 2026. It turns a technical wall into a series of smart, connected wins for you. This ensures your team stays on the same page as your global partners.


Best Practices: Keeping Your Gmail Fast and Clean

Finalizing your repair requires you to be proactive about your digital space. It needs you to delete old junk mail and large attachments every few weeks. Clearly, a lean inbox loads much faster on every device you own. Therefore, follow these simple tips to stay ahead of any new Gmail errors.

Simple Tips for a Perfect Inbox

Firstly, use the “Basic HTML” view if your internet is very slow today. This helps the app run faster even when your signal is very weak. Secondly, unsubscribe from unwanted newsletters to keep your data load small.

Furthermore, set your sync period to “30 days” on mobile to save your phone’s memory. Also, use transition words in your emails to keep them very easy to read. Lastly, check your search engine data to see if reply speed helps your sales. Truly, a working inbox is a journey that leads to a much better brand. It builds a path of order that lets your whole team grow very fast. This secures your future in the digital world for a long time.


Frequently Asked Questions (FAQs)

Q1: Why is my Gmail stuck on the loading bar?

This usually happens because of corrupted browser cache or a bad internet connection.

Q2: Will clearing my Gmail cache delete my emails?

No, it only deletes temporary files and will not touch your actual messages or data.

Q3: Why can’t I fetch mail from other accounts in 2026?

Google stopped support for POP fetching in January 2026; you should use IMAP or forwarding.

Q4: Does a full Google Drive stop Gmail from loading?

Yes, if your 15GB limit is reached, your account will stop receiving and loading new mail.

Q5: How do I fix Gmail not loading on a new iPhone?

Ensure you have the latest iOS version and that “Background App Refresh” is on for Gmail.

Also Read: How to sync Google Calendar invites across all devices

How to sync Google Calendar invites across all devices

You must keep your schedule on track to win in business today. Therefore, you should learn why your Google Calendar invites often go missing. Truly, missing a meeting because of a technical glitch is a big problem. Consequently, you can fix this issue by checking a few simple settings in your account.

Many people think that a missing invite is just a one-time error. But, the reality is that certain settings can block your invites every single day. Always remember, a reliable calendar is a strong signal for any search engine. This ensures that your brand stays professional and your team stays on time. This approach requires you to look at both your email and your calendar rules. It helps you build a much more dependable workflow for the long term. It makes your daily scheduling feel much more secure and very effective.

Why Google Calendar invites go to spam


Phase 1: Checking Your Event Invitation Settings

First, you must look at how Google handles new invites by default. Why do some events appear on your grid while others stay hidden? Clearly, Google has a “gatekeeper” setting that filters incoming requests. Therefore, you must ensure your account is set to add invitations automatically.

How to Enable Automatic Event Addition

Here are several ways to fix your invitation visibility in 2026:

  • Open Google Calendar on your computer and click the gear icon for Settings.

  • Go to General and then select Event settings on the left menu.

  • Look for the option labeled “Add invitations to my calendar” today.

  • Select “From everyone” to ensure all invites appear on your grid.

  • Check the box for “Only if the sender is known” if you want to avoid spam.

  • Verify that “When I respond to the invitation in email” is not selected.

  • Ensure you add your frequent contacts to your Google Contacts list fast.

Truly, this setting is the most common reason for a “hidden” invite. But, you must also consider if the invite is landing in your spam folder. This keeps your inbox clean and prevents any missed connections for your team. It creates a very high standard for your digital organization.


Phase 2: Solving Email Notification and Spam Issues

So, what happens if the invite never even reaches your email inbox? Truly, Gmail might mistake a calendar request for a junk or promo message. Consequently, you should check your filters and labels to find your missing mail. It acts as a digital filter that might be too strong for your own good.

Finding Missing Invites in Your Gmail

Here is how you can track down a lost invitation email:

  1. Check Spam: Open your Spam folder and search for “invitation” right now.

  2. Review Filters: Look at your Gmail filters to see if any rules delete invites.

  3. Check Tabs: Look in the “Updates” or “Promotions” tabs for your mail.

  4. Search Everything: Use the “in:anywhere” search command to find the message.

  5. Verify Sender: Ask the host if they sent the invite to the right email address.

  6. Check Storage: Ensure your Google account has enough space to take new mail.

  7. Site Trust: Fast email replies help your brand earn more search engine trust.

Furthermore, this improves your search engine performance by showing that you are an active user. It makes your company look very responsive and ready for 2026 tasks. This ensures that you see every single request from your clients and partners. It creates a very fast and clear path for your professional growth.


Phase 3: Fixing Mobile App and Sync Errors

The third phase involves looking at your smartphone and tablet apps. Clearly, your phone might not be talking to the Google servers correctly. Therefore, you should refresh your sync settings to pull in the latest events.

How to Force a Calendar Refresh

Firstly, open the Google Calendar app and tap the menu icon in the top left. This allows you to see all the calendars you currently have active. Secondly, scroll down and ensure that your main email account has a checkmark next to it.

Furthermore, go to your phone settings and find the “Accounts and Sync” section. Also, tap your Google account and ensure that the “Calendar” toggle is on. Lastly, remember that a synced device helps your search engine authority and user speed. Truly, a quick sync is the best way to fix a mobile display issue. It allows you to see your schedule no matter where you are in the world. This is why top pros check their sync settings every morning.


Phase 4: Dealing with Cross-Platform Issues

The fourth phase addresses the conflict between Google and other tools like Outlook. Clearly, invites sent from a different system can sometimes get lost in transit. Therefore, you must know how to handle invites from Apple or Microsoft users.

Bridging the Gap Between Different Systems

Firstly, ask the sender to send the invite in a standard “iCalendar” format. This helps Google Workspace understand the data and place it on your grid. Secondly, check if your organization has any firewalls that block external invites.

Furthermore, use a tool like “Sync2” if you must link your Google and Outlook lives. Also, use simple words in your reply to ask for a resend if the first one fails. Lastly, check your search engine ranking to see how reliability helps your site. Truly, cross-platform health is your best tool for a global business in 2026. It turns a technical wall into a series of smart, connected bridges. This ensures your team stays on the same page as your global partners.


Best Practices: Preventing Future Invite Problems

Finalizing your setup requires you to be proactive about your digital health. It needs you to clear your browser cache if the web view feels slow or buggy. Clearly, a clean browser helps Google Calendar work much better for you. Therefore, follow these simple tips to stay ahead of any new calendar errors.

Simple Tips for a Glitch Free Calendar

Firstly, use the Google Chrome browser for the most stable calendar experience today. This helps the app run faster and with fewer errors than in other browsers. Secondly, update your Google Calendar app as soon as a new version arrives.

Furthermore, tell your team to use “Google Groups” for large meeting invites. Also, use transition words in your event descriptions to keep them easy to read. Lastly, check your search engine data to see if appointment speed helps your sales. Truly, a working calendar is a journey that leads to a much better brand. It builds a path of order that lets your whole team grow very fast. This secures your future in the digital world for a long time.


Frequently Asked Questions (FAQs)

Q1: Why do my invites only show up in email and not on the grid?

This usually happens because your “Add invitations” setting is set to “Only when I respond.”

Q2: Can a full Google Drive stop my calendar from working?

Yes, if your storage is full, you will stop receiving new emails and calendar invites.

Q3: Does using a reliable calendar help my search engine rank?

Yes, it improves your business reputation and response times, which are key for local SEO.

Q4: Why can’t I see invites sent to my alias?

Google often filters invites sent to an alias differently; try to use your primary email for meetings.

Q5: How do I fix a calendar that won’t sync on my iPhone?

Go to Settings > Calendar > Accounts and ensure your Google account has “Calendars” toggled on.

Also Read: Guide to email forwarding for better organization

How to migrate to Google Workspace in five easy steps

You must plan your move to Google Workspace with great care today. Therefore, you should learn the best ways to migrate without losing any data. Truly, moving your emails and files is a big task for any business. Consequently, you can keep your information safe by following a clear, step by step plan.

Many people think that moving between platforms is a risky and messy process. But, the reality is that the right tools make the switch very smooth. Always remember, a successful migration is a strong signal for any search engine. This ensures that your brand stays stable and your team stays productive. This approach requires you to audit your data and test your tools. It helps you build a much more modern workplace for the long term. It makes your daily operations feel much more flexible and very effective.

migrate to Google Workspace with a plan


Phase 1: Auditing Your Current Data and Users

First, you must look at what you have in Microsoft 365. Why is a data audit the most important first step? Clearly, you cannot move what you do not know you have. Therefore, you must count every mailbox, calendar, and file before you start.

Steps to Inventory Your Digital Assets

Here are several ways you can prepare for a clean migration:

  • List every user account that needs a new home in Google.

  • Identify all shared mailboxes and group emails in your system.

  • Check the size of every OneDrive and SharePoint folder today.

  • Remove old and unneeded files to save on storage space.

  • Document all special permissions for your most sensitive data.

  • Find any large attachments that might slow down your move.

  • Mark your most critical users for a priority migration.

Truly, these steps prevent any surprises once the migration begins. But, you must also set a clear date for when the move starts. This keeps your team on track and prevents any last minute panic. It creates a very professional and high standard for your project.


Phase 2: Choosing the Right Migration Tool

So, how do you actually move the data from one cloud to the other? Truly, Google offers many tools to help you with this transition. Consequently, you should pick the tool that fits your company size and needs. It acts as a digital bridge that moves your data safely and quickly.

Top Tools for a Data Safe Transition

Here is how you can pick the best migration tool for your team:

  1. Data Migration Service (DMS): Use this built-in tool for small and simple moves.

  2. Google Workspace Migrate: Choose this for large firms with many complex files.

  3. Third-Party Tools: Look at apps like BitTitan or CloudM for extra features.

  4. IMAP Migration: Use this method if you only need to move your emails.

  5. GWMME Tool: Try this for server-side migrations with advanced settings.

  6. Desktop Sync: Use Google Drive for Desktop for small batches of files.

  7. Technical Support: Partner with a pro if your data is very complex.

Furthermore, this improves your search engine performance by reducing downtime for your team. It makes your brand look very prepared and ready for 2026 tech. This ensures that every email and contact lands in the right spot. It creates a very fast and clear path for your technical setup.


Phase 3: Setting Up Your Google Environment

The third phase involves preparing the destination for your data. Clearly, you must create a place for your files to land before you send them. Therefore, you should set up your Google Workspace account with all the right roles.

Preparing the Landing Zone for Your Data

Firstly, create all your user accounts in the Google Admin console. This allows the migration tool to map the old users to the new ones. Secondly, assign the correct licenses to every person on your team.

Furthermore, verify your domain with Google so you can take new emails. Also, set up your organizational units and groups to match your structure. Lastly, remember that a clean setup helps your search engine trust and user speed. Truly, a ready environment is the best way to handle your data safely. It allows the migration to run without hitting any technical walls. This is why top admins spend so much time on their settings.


Phase 4: Running Tests and Executing the Move

The fourth phase is where the actual data transfer happens. Clearly, you should never move everything all at once without a test. Therefore, you must run a pilot migration for a small group of users first.

How to Execute a Zero Loss Migration

Firstly, pick five users to test the migration of their mail and files. This helps you find any errors before they impact the whole company. Secondly, check the test data to ensure every label and folder is correct.

Furthermore, start the full migration during a slow time like the weekend. Also, use a “delta migration” to catch any new emails sent during the move. Lastly, check your search engine ranking to see how your site handles the change. Truly, a phased approach is your best tool against data loss. It turns a scary move into a series of small, safe steps. This ensures your business stays running while the data moves behind the scenes.


Best Practices: Finalizing the Switch

Closing out your migration requires a few last critical steps. It needs you to update your DNS records to point to your new home. Clearly, you must tell the world where to send your emails now. Therefore, follow these simple tips to finish your move with total success.

Simple Tips for a Successful Cutover

Firstly, update your MX records to point to Google Workspace today. This tells other mail servers to send your new messages to Gmail. Secondly, update your SPF and DKIM records to stop your mail from being spam.

Furthermore, tell your team to stop using Microsoft 365 for any new work. Also, use transition words in your guides to show people how to use Drive. Lastly, keep your old accounts for 30 days just in case you missed a file. Truly, a clean finish is a journey that leads to a much better brand. It builds a path of safety that lets your whole team grow very fast. This secures your future in the digital world for a long time.


Frequently Asked Questions (FAQs)

Q1: Will I lose my old emails during the move?

No, if you use a professional migration tool, all your old emails will move safely to Gmail.

Q2: How long does a full migration take?

For a small team, it usually takes one day, but large firms can take a full week.

Q3: Does migrating help my search engine ranking?

Yes, moving to a faster and more modern platform improves your site’s health and user trust scores.

Q4: Can I move my SharePoint files to Google Drive?

Yes, tools like Google Workspace Migrate can move your SharePoint data and keep your permissions.

Q5: Should I hire a pro for my migration?

If you have more than 50 users or very complex data, a pro can save you time and prevent errors.

Also Read: How to prevent data leaks and keep files secure

How Google Workspace Syncs Your Many Domains Easily

Running several businesses or brands from one place is a common goal in 2026. Therefore, many entrepreneurs use Google Workspace to keep everything under a single roof. Truly, the ability to manage multiple domains is one of the most powerful features for growing companies. Consequently, you can save money on licenses while keeping your digital life very organized and professional.

Some people feel that adding more domains will always lead to a messy inbox or lost emails. But, the reality is that Google provides very clear tools to separate your different identities. Always remember, a well structured digital office is a strong signal for any search engine to value your business. This ensures that you can respond to every customer quickly and from the correct email address. This approach requires a clear understanding of how secondary domains and aliases work. It helps you build a much more efficient and scalable company for the future. It makes your administrative tasks feel much simpler and more direct.

How Google Workspace Syncs Your Many Domains Easily


Phase 1: Choosing Between Secondary Domains and Domain Aliases

First, let us look at the two main ways to add a new domain to your account. Why does this choice matter so much for your daily workflow? Clearly, the wrong setup can lead to exactly the confusion you are trying to avoid. Therefore, you must decide if you need a completely separate identity or just a nickname for your existing one.

Understanding the Two Domain Types in Google Workspace

Here are the key differences between these two options:

  • Secondary Domain: This is best for a separate business unit or a new brand name. It allows you to create unique users like sales@brand-b.com. You can have different logos and signatures for this domain.

  • Domain Alias: This acts as a nickname for your primary domain only. Every user gets an extra email at the new domain automatically. Emails sent to the alias arrive in your main primary inbox. It is perfect for catching common typos or owning both .com and .net versions.

Truly, selecting the right type is the foundation of a clean Workspace setup. But, you must also consider that secondary domains may require extra attention during the setup phase. This keeps your brands distinct and prevents any accidental cross over in your communication. It creates a very professional image for every person you email.


Phase 2: Organizing Your Users with Organizational Units (OUs)

So, how do you keep your settings separate once all your domains are in one account? Truly, the secret to a confusion free setup lies in using Organizational Units correctly. Consequently, you can apply different rules and features to different groups of people based on their domain. It acts as a digital filing cabinet for your entire team.

Best Practices for Using OUs with Multiple Domains

Here is how you can use OUs to stay organized:

  1. Create a Parent OU for each brand: This keeps your main business separate from your side projects.

  2. Apply specific apps to each group: Maybe only one brand needs access to certain Google tools.

  3. Manage sharing settings by OU: You can stop people in brand A from seeing sensitive files in brand B.

  4. Set unique signatures by unit: Ensure every outgoing email has the correct branding and logo.

  5. Control storage limits: Give more space to the teams that handle large video or image files.

  6. Customize the theme: Use different colors in the admin panel to quickly see which unit you are editing.

  7. Monitor activity by brand: Run reports to see how each separate part of your company is performing.

Furthermore, this improves how a search engine views your data security and site structure. It makes your management tasks much faster and reduces the risk of human error. This ensures that your private company data stays where it belongs at all times. It creates a very secure and logical environment for your growing team.


Phase 3: Mastering Your Inbox with Send Mail As

The third phase looks at how you actually send emails without confusing your customers. Clearly, you do not want to reply to a Brand B customer using a Brand A email address. Therefore, you must master the Send Mail As feature in Gmail to keep your identities perfectly clear.

How to Handle Multiple Inboxes Like a Pro

Firstly, add all your secondary and alias addresses to your Gmail settings. This allows you to choose which address appears in the From field when you compose a message. Secondly, use the Reply from the same address feature. This ensures that your responses always match the address the customer used to reach you.

Furthermore, create separate folders and labels for each of your domains. This lets you see at a glance which business needs your attention right now. Also, use different colored stars or tags to mark urgent emails for each brand. Lastly, set up automated filters to sort incoming mail into the correct categories before you even see it. Truly, these small habits prevent you from feeling overwhelmed by a busy inbox. It allows you to switch between different business roles in just a few clicks. This is why the most efficient owners spend time perfecting their Gmail filters.


Phase 4: Managing Shared Drives and Collaboration

The fourth phase is about keeping your files and documents organized across different brands. Clearly, having one giant pile of files is a recipe for disaster. Therefore, you must use Shared Drives to create clear boundaries between your various domain projects.

Keeping Your Files Organized and Secure

Firstly, create a separate Shared Drive for each of your primary and secondary domains. This ensures that only the people working on a specific brand have access to those files. Secondly, use clear naming conventions for all your folders and documents.

Furthermore, manage your sharing permissions very carefully. Never share a folder with the entire organization if it only belongs to one specific brand. Also, utilize the search engine within Drive to find documents quickly across all your domains. Lastly, regular audits of your file permissions will keep your data safe and compliant. Truly, a clean file system is just as important as a clean inbox for business success. It turns your digital storage into a powerful asset rather than a confusing mess. This ensures your team can find what they need without asking for help every day.


Best Practices: Maintaining Your Multi Domain Setup

Keeping your Google Workspace healthy is an ongoing task that requires a steady hand. It needs a focus on regular maintenance and staying updated with the latest 2026 features. Clearly, an organized account today can still become messy tomorrow if you are not careful. Therefore, follow these simple steps to maintain your high standards.

Strategies for Continued Organization and Success

Firstly, perform a monthly audit of your user list and domains. Remove any addresses or people that are no longer active in your business. Secondly, update your organizational units as your company grows or changes its structure.

Furthermore, keep a close eye on your search engine performance for each of your domain websites. Use the data to see which brands are growing the fastest and need more resources. Also, encourage your team to follow the same labeling and filing rules that you use. Lastly, stay educated on new Google Workspace updates that make managing multiple domains even easier. Truly, organization is a journey that pays off in higher productivity and lower stress. It builds a strong foundation for a multi brand empire that is easy to manage. This secures your competitive advantage in the digital landscape of 2026.


Frequently Asked Questions (FAQs)

Q1: Can I have different logos for each domain in Google Workspace?

Yes, you can set different logos by using Organizational Units. This ensures that the correct brand identity is shown to users in each part of your business.

Q2: Does having multiple domains affect my search engine ranking?

Managing them in one account does not hurt your rank. In fact, a fast and organized setup can help improve your site performance, which is a key ranking factor.

Q3: Do I have to pay for an extra license for a secondary domain?

No, you do not pay for the domain itself. However, if you create a new user account with that domain, you will need a standard license for that specific user.

Q4: Can one user have email addresses at two different domains?

Yes, you can add an email alias to a user. This allows them to receive and send mail from both domains using a single login and inbox.

Q5: What is the limit on how many domains I can add?

Most Google Workspace accounts allow you to add up to 600 domains, including your primary domain and all secondary or alias domains.

Also Read: How to Fix Google Sheets Slowdowns for Better Productivity