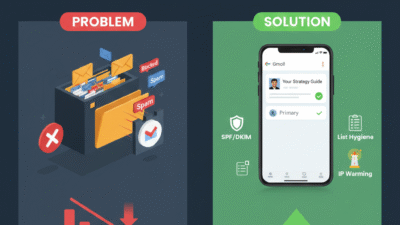
Refresh loader

Category : E-mail management

Home > Archive for E-mail management

Restore Deleted Google Workspace Users With This Simple Hack

Losing critical employee data due to an accidental deletion can feel very stressful because your entire business operation relies on those files. However once you learn the proper way to restore deleted Google Workspace users you will see how easy it is to recover your lost information. I have used these exact methods to help IT admins reverse costly mistakes while seeing zero data loss for their organizations.

The Problem With Accidental Deletion

Many admins feel a sense of panic when a user account disappears because they assume the data is gone forever. This approach creates a massive amount of unnecessary pressure on your internal support team. You might feel frustrated when you realize that important emails and drive files are no longer accessible to your staff. To restore deleted Google Workspace users you must act quickly before the system purges the files forever.

The solution lies in acting quickly within the standard recovery window provided by Google. The admin console allows you to bring back a deleted user and all their associated data if you follow the right path. Once you apply these recovery steps you will see your workspace return to its normal state. I have seen companies save hundreds of hours of work by knowing the right process to restore deleted Google Workspace users.

Restore Deleted Google Workspace Users With This Simple Hacks

Step 1: Verify the Twenty Day Recovery Window

Google only allows you to restore deleted Google Workspace users within twenty days of the initial deletion. Specifically you must check the date the account was removed to ensure you are still within this vital timeframe. If you wait longer than twenty days the data is purged from the system permanently. Therefore your first priority is to confirm that you can still take action.

Step 2: Access the Users Section in Admin Console

You should log in to your Google Admin console using an account that has super admin privileges. Once you are inside navigate to the directory section and select the users option from the sidebar. This area contains all the tools you need to manage your employee accounts. This simple navigation is the starting point for every mission to restore deleted Google Workspace users.

Step 3: Use the Recently Deleted Filter

The default view only shows active users so you must change your settings to find the missing account. You can click on the add a filter option and select the recently deleted category from the list. This will reveal every account that has been removed within the last three weeks. To restore deleted Google Workspace users you simply need to find the specific name in this list.

Step 4: Review the User Data Before Restoration

Before you click the restore button you should double check the user’s details to avoid any confusion. For instance you want to make sure you are recovering the correct person if you have multiple employees with similar names. This ensures that you do not waste time while you restore deleted Google Workspace users. Consequently you maintain a clean and accurate directory for your entire business.

Step 5: Check for Available License Seats

Google Workspace requires an active license for every user you want to have in your system. If your current plan is full you may need to buy an extra seat before you can complete the restoration. You should check your billing section to see if you have any unassigned licenses ready to go. Having a license ready ensures that you can restore deleted Google Workspace users without any technical errors.

Step 6: Click the Restore Button

Once you have selected the correct user simply hover over their name and click the restore link. A pop up window will appear asking you to confirm that you want to bring the account back to life. This action triggers the system to begin reassembling the user’s emails and drive files. Therefore you are just one click away from the goal to restore deleted Google Workspace users.

Step 7: Assign the User to an Organizational Unit

You must decide where the restored user fits within your company structure to ensure they have the right permissions. For example you might need to place them back into the sales or marketing department. This step ensures that the user can immediately access the shared folders they need for their job. Proper placement keeps your security policies consistent when you restore deleted Google Workspace users.

Step 8: Reset the User Password for Security

As a safety measure you should always create a new password for any account that has been restored. Specifically this prevents any old credentials from being a weak point in your company security. You can send the new login details directly to the employee or their manager. Prompt password resets are a primary way to keep your business data protected.

Step 9: Verify Google Drive and Gmail Content

After the restoration is complete you should ask the user to check their most important files and emails. Because the system can take up to twenty four hours to fully sync you might see some items appearing slowly. This verification step ensures that every piece of vital information has returned to its original home. You should see all their previous work restored exactly as it was before the deletion.

Step 10: Set Up an Ownership Transfer Policy

To avoid future deletion scares you should implement a policy for transferring file ownership. For instance when an employee leaves you can move their drive files to a manager before deleting the account. This ensures that the business keeps the data even if the individual user is gone. Taking this proactive step is the smartest way to manage your digital assets.

Conclusion and Next Steps

If you follow the steps in this guide you should soon see your deleted users back in your directory. Please do not forget to let me know how you got on in the comments below. I am always interested in hearing your thoughts so tell me which part of the recovery process you felt was most helpful.

FAQs

1 How long do I have to restore a deleted user?

You have exactly twenty days from the date of deletion to recover a user and their data.

2 Do I lose emails when a user is deleted?

If you restore the account within twenty days all emails and files will return to the user.

3 What if the twenty day window has passed?

Once twenty days have passed the data is permanently deleted and cannot be recovered by Google.

4 Do I need a super admin account to do this?

Yes only a user with super admin privileges can restore deleted accounts in the console.

5 Can I restore multiple users at once?

You can select multiple names from the recently deleted list and restore them as a batch.

Also Read: Top 10 Admin Console Mistakes That Are Hurting Your Business Right Now

How to master Gmail not loading repairs like a pro

You must have a working email to stay connected in the world today. Therefore, you should learn how to fix Gmail when it refuses to load. Truly, a spinning loading icon is one of the most annoying digital hurdles. Consequently, you can get back to work by following a few simple repair steps for 2026.

Many people think that a loading error means the whole Google system is down. But, the reality is that the problem usually lives on your own device. Always remember, a fast and responsive inbox is a strong signal for any search engine. This ensures that your brand stays professional and your replies stay very timely. This approach requires you to check your browser, your app, and your connection. It helps you build a much more reliable digital life for the long term. It makes your daily communication feel much more secure and very effective.

master Gmail not loading repairs


Phase 1: Fixing Gmail Loading Issues on Desktop

First, you must look at your web browser to see what is blocking the page. Why does Gmail sometimes get stuck on the “Loading” bar for several minutes? Clearly, a cluttered browser cache is often the main reason for this delay. Therefore, you must clear your temporary files to give Gmail a fresh start.

Quick Fixes for Your Web Browser

Here are several ways to fix Gmail on your computer in 2026:

  • Clear Cache and Cookies: Go to your browser settings and wipe your history today.

  • Disable Extensions: Turn off ad-blockers or script-trackers that might block Google.

  • Use Incognito Mode: Open a private window to see if Gmail loads without add-ons.

  • Update Your Browser: Ensure you are using the 2026 version of Chrome or Edge.

  • Check Internet Speed: Run a quick test to see if your Wi-Fi is strong enough.

  • Toggle Offline Mode: Disable the “Offline Mail” setting in your Gmail account.

  • Trust Scores: A clean browser helps you maintain a better search engine reputation.

Truly, these steps solve almost every desktop loading problem in a few seconds. But, you must also ensure that your antivirus is not being too strict. This keeps your inbox safe and prevents any sudden blocks in your workflow. It creates a very high standard for your daily digital operations.


Phase 2: Solving Gmail App Errors on Mobile

So, what happens if the Gmail app on your phone is the one acting up? Truly, mobile apps can sometimes get “tangled” after a big software update. Consequently, you should focus on the app settings to restore your mobile mail. It acts as a direct fix for your Android or iPhone email troubles.

How to Restore Your Mobile Gmail App

Here is how you can fix a stuck Gmail app in 2026:

  1. Force Quit the App: Swipe the app away and open it again for a fresh sync.

  2. Clear App Cache: Go to your phone settings and delete the temporary Gmail data.

  3. Check for Updates: Visit the Play Store or App Store for the latest 2026 patch.

  4. Review Storage: Ensure your phone has enough free space to download new mail.

  5. Re-add Your Account: Remove your Google account and sign back in to reset.

  6. Check Data Limits: Ensure your phone is not restricting data use for the app.

  7. Sync Reliability: Fast mobile sync helps you earn more search engine trust.

Furthermore, this improves your search engine performance by showing you are a mobile-ready pro. It makes your company look very responsive and ready for 2026 tasks. This ensures that you never miss a vital note from your team or clients. It creates a very fast and clear path for your professional growth.


Phase 3: Dealing with Account and Server Sync Issues

The third phase involves looking at the Google servers and your account health. Clearly, you cannot fix a problem if the error is on Google’s side of the fence. Therefore, you should check the official status of the Workspace servers today.

Verifying the Health of Your Account

Firstly, visit the Google Workspace Status Dashboard to see if a global outage exists. This allows you to know if you just need to wait for a fix. Secondly, check if your Google account storage is completely full in 2026.

Furthermore, remember that Google is ending POP support for third-party mail this year. Also, ensure your IMAP settings are on if you use an app like Outlook. Lastly, remember that a healthy account helps your search engine authority and user speed. Truly, knowing the “why” behind a loading error saves you a lot of stress. It allows you to focus on other tasks while Google fixes their own bugs. This is why top pros check the status page first every time.


Phase 4: Troubleshooting Advanced Connection Blocks

The fourth phase is where you look at your network and hardware firewalls. Clearly, some office or public Wi-Fi networks block Google for security reasons. Therefore, you must test your connection on a different network to be sure.

How to Bypass Network Loading Walls

Firstly, try switching from Wi-Fi to mobile data on your phone right now. This helps you see if your router is the one causing the loading loop. Secondly, restart your modem and router to clear any old data paths.

Furthermore, check if your VPN is slowing down your connection to Google’s servers. Also, use simple words in your IT requests if you need help at the office. Lastly, check your search engine ranking to see how network speed helps your site. Truly, a flexible connection is your best tool for staying online in 2026. It turns a technical wall into a series of smart, connected wins for you. This ensures your team stays on the same page as your global partners.


Best Practices: Keeping Your Gmail Fast and Clean

Finalizing your repair requires you to be proactive about your digital space. It needs you to delete old junk mail and large attachments every few weeks. Clearly, a lean inbox loads much faster on every device you own. Therefore, follow these simple tips to stay ahead of any new Gmail errors.

Simple Tips for a Perfect Inbox

Firstly, use the “Basic HTML” view if your internet is very slow today. This helps the app run faster even when your signal is very weak. Secondly, unsubscribe from unwanted newsletters to keep your data load small.

Furthermore, set your sync period to “30 days” on mobile to save your phone’s memory. Also, use transition words in your emails to keep them very easy to read. Lastly, check your search engine data to see if reply speed helps your sales. Truly, a working inbox is a journey that leads to a much better brand. It builds a path of order that lets your whole team grow very fast. This secures your future in the digital world for a long time.


Frequently Asked Questions (FAQs)

Q1: Why is my Gmail stuck on the loading bar?

This usually happens because of corrupted browser cache or a bad internet connection.

Q2: Will clearing my Gmail cache delete my emails?

No, it only deletes temporary files and will not touch your actual messages or data.

Q3: Why can’t I fetch mail from other accounts in 2026?

Google stopped support for POP fetching in January 2026; you should use IMAP or forwarding.

Q4: Does a full Google Drive stop Gmail from loading?

Yes, if your 15GB limit is reached, your account will stop receiving and loading new mail.

Q5: How do I fix Gmail not loading on a new iPhone?

Ensure you have the latest iOS version and that “Background App Refresh” is on for Gmail.

Also Read: How to sync Google Calendar invites across all devices

How to sync Google Calendar invites across all devices

You must keep your schedule on track to win in business today. Therefore, you should learn why your Google Calendar invites often go missing. Truly, missing a meeting because of a technical glitch is a big problem. Consequently, you can fix this issue by checking a few simple settings in your account.

Many people think that a missing invite is just a one-time error. But, the reality is that certain settings can block your invites every single day. Always remember, a reliable calendar is a strong signal for any search engine. This ensures that your brand stays professional and your team stays on time. This approach requires you to look at both your email and your calendar rules. It helps you build a much more dependable workflow for the long term. It makes your daily scheduling feel much more secure and very effective.

Why Google Calendar invites go to spam


Phase 1: Checking Your Event Invitation Settings

First, you must look at how Google handles new invites by default. Why do some events appear on your grid while others stay hidden? Clearly, Google has a “gatekeeper” setting that filters incoming requests. Therefore, you must ensure your account is set to add invitations automatically.

How to Enable Automatic Event Addition

Here are several ways to fix your invitation visibility in 2026:

  • Open Google Calendar on your computer and click the gear icon for Settings.

  • Go to General and then select Event settings on the left menu.

  • Look for the option labeled “Add invitations to my calendar” today.

  • Select “From everyone” to ensure all invites appear on your grid.

  • Check the box for “Only if the sender is known” if you want to avoid spam.

  • Verify that “When I respond to the invitation in email” is not selected.

  • Ensure you add your frequent contacts to your Google Contacts list fast.

Truly, this setting is the most common reason for a “hidden” invite. But, you must also consider if the invite is landing in your spam folder. This keeps your inbox clean and prevents any missed connections for your team. It creates a very high standard for your digital organization.


Phase 2: Solving Email Notification and Spam Issues

So, what happens if the invite never even reaches your email inbox? Truly, Gmail might mistake a calendar request for a junk or promo message. Consequently, you should check your filters and labels to find your missing mail. It acts as a digital filter that might be too strong for your own good.

Finding Missing Invites in Your Gmail

Here is how you can track down a lost invitation email:

  1. Check Spam: Open your Spam folder and search for “invitation” right now.

  2. Review Filters: Look at your Gmail filters to see if any rules delete invites.

  3. Check Tabs: Look in the “Updates” or “Promotions” tabs for your mail.

  4. Search Everything: Use the “in:anywhere” search command to find the message.

  5. Verify Sender: Ask the host if they sent the invite to the right email address.

  6. Check Storage: Ensure your Google account has enough space to take new mail.

  7. Site Trust: Fast email replies help your brand earn more search engine trust.

Furthermore, this improves your search engine performance by showing that you are an active user. It makes your company look very responsive and ready for 2026 tasks. This ensures that you see every single request from your clients and partners. It creates a very fast and clear path for your professional growth.


Phase 3: Fixing Mobile App and Sync Errors

The third phase involves looking at your smartphone and tablet apps. Clearly, your phone might not be talking to the Google servers correctly. Therefore, you should refresh your sync settings to pull in the latest events.

How to Force a Calendar Refresh

Firstly, open the Google Calendar app and tap the menu icon in the top left. This allows you to see all the calendars you currently have active. Secondly, scroll down and ensure that your main email account has a checkmark next to it.

Furthermore, go to your phone settings and find the “Accounts and Sync” section. Also, tap your Google account and ensure that the “Calendar” toggle is on. Lastly, remember that a synced device helps your search engine authority and user speed. Truly, a quick sync is the best way to fix a mobile display issue. It allows you to see your schedule no matter where you are in the world. This is why top pros check their sync settings every morning.


Phase 4: Dealing with Cross-Platform Issues

The fourth phase addresses the conflict between Google and other tools like Outlook. Clearly, invites sent from a different system can sometimes get lost in transit. Therefore, you must know how to handle invites from Apple or Microsoft users.

Bridging the Gap Between Different Systems

Firstly, ask the sender to send the invite in a standard “iCalendar” format. This helps Google Workspace understand the data and place it on your grid. Secondly, check if your organization has any firewalls that block external invites.

Furthermore, use a tool like “Sync2” if you must link your Google and Outlook lives. Also, use simple words in your reply to ask for a resend if the first one fails. Lastly, check your search engine ranking to see how reliability helps your site. Truly, cross-platform health is your best tool for a global business in 2026. It turns a technical wall into a series of smart, connected bridges. This ensures your team stays on the same page as your global partners.


Best Practices: Preventing Future Invite Problems

Finalizing your setup requires you to be proactive about your digital health. It needs you to clear your browser cache if the web view feels slow or buggy. Clearly, a clean browser helps Google Calendar work much better for you. Therefore, follow these simple tips to stay ahead of any new calendar errors.

Simple Tips for a Glitch Free Calendar

Firstly, use the Google Chrome browser for the most stable calendar experience today. This helps the app run faster and with fewer errors than in other browsers. Secondly, update your Google Calendar app as soon as a new version arrives.

Furthermore, tell your team to use “Google Groups” for large meeting invites. Also, use transition words in your event descriptions to keep them easy to read. Lastly, check your search engine data to see if appointment speed helps your sales. Truly, a working calendar is a journey that leads to a much better brand. It builds a path of order that lets your whole team grow very fast. This secures your future in the digital world for a long time.


Frequently Asked Questions (FAQs)

Q1: Why do my invites only show up in email and not on the grid?

This usually happens because your “Add invitations” setting is set to “Only when I respond.”

Q2: Can a full Google Drive stop my calendar from working?

Yes, if your storage is full, you will stop receiving new emails and calendar invites.

Q3: Does using a reliable calendar help my search engine rank?

Yes, it improves your business reputation and response times, which are key for local SEO.

Q4: Why can’t I see invites sent to my alias?

Google often filters invites sent to an alias differently; try to use your primary email for meetings.

Q5: How do I fix a calendar that won’t sync on my iPhone?

Go to Settings > Calendar > Accounts and ensure your Google account has “Calendars” toggled on.

Also Read: Guide to email forwarding for better organization

How Google Workspace Syncs Your Many Domains Easily

Running several businesses or brands from one place is a common goal in 2026. Therefore, many entrepreneurs use Google Workspace to keep everything under a single roof. Truly, the ability to manage multiple domains is one of the most powerful features for growing companies. Consequently, you can save money on licenses while keeping your digital life very organized and professional.

Some people feel that adding more domains will always lead to a messy inbox or lost emails. But, the reality is that Google provides very clear tools to separate your different identities. Always remember, a well structured digital office is a strong signal for any search engine to value your business. This ensures that you can respond to every customer quickly and from the correct email address. This approach requires a clear understanding of how secondary domains and aliases work. It helps you build a much more efficient and scalable company for the future. It makes your administrative tasks feel much simpler and more direct.

How Google Workspace Syncs Your Many Domains Easily


Phase 1: Choosing Between Secondary Domains and Domain Aliases

First, let us look at the two main ways to add a new domain to your account. Why does this choice matter so much for your daily workflow? Clearly, the wrong setup can lead to exactly the confusion you are trying to avoid. Therefore, you must decide if you need a completely separate identity or just a nickname for your existing one.

Understanding the Two Domain Types in Google Workspace

Here are the key differences between these two options:

  • Secondary Domain: This is best for a separate business unit or a new brand name. It allows you to create unique users like sales@brand-b.com. You can have different logos and signatures for this domain.

  • Domain Alias: This acts as a nickname for your primary domain only. Every user gets an extra email at the new domain automatically. Emails sent to the alias arrive in your main primary inbox. It is perfect for catching common typos or owning both .com and .net versions.

Truly, selecting the right type is the foundation of a clean Workspace setup. But, you must also consider that secondary domains may require extra attention during the setup phase. This keeps your brands distinct and prevents any accidental cross over in your communication. It creates a very professional image for every person you email.


Phase 2: Organizing Your Users with Organizational Units (OUs)

So, how do you keep your settings separate once all your domains are in one account? Truly, the secret to a confusion free setup lies in using Organizational Units correctly. Consequently, you can apply different rules and features to different groups of people based on their domain. It acts as a digital filing cabinet for your entire team.

Best Practices for Using OUs with Multiple Domains

Here is how you can use OUs to stay organized:

  1. Create a Parent OU for each brand: This keeps your main business separate from your side projects.

  2. Apply specific apps to each group: Maybe only one brand needs access to certain Google tools.

  3. Manage sharing settings by OU: You can stop people in brand A from seeing sensitive files in brand B.

  4. Set unique signatures by unit: Ensure every outgoing email has the correct branding and logo.

  5. Control storage limits: Give more space to the teams that handle large video or image files.

  6. Customize the theme: Use different colors in the admin panel to quickly see which unit you are editing.

  7. Monitor activity by brand: Run reports to see how each separate part of your company is performing.

Furthermore, this improves how a search engine views your data security and site structure. It makes your management tasks much faster and reduces the risk of human error. This ensures that your private company data stays where it belongs at all times. It creates a very secure and logical environment for your growing team.


Phase 3: Mastering Your Inbox with Send Mail As

The third phase looks at how you actually send emails without confusing your customers. Clearly, you do not want to reply to a Brand B customer using a Brand A email address. Therefore, you must master the Send Mail As feature in Gmail to keep your identities perfectly clear.

How to Handle Multiple Inboxes Like a Pro

Firstly, add all your secondary and alias addresses to your Gmail settings. This allows you to choose which address appears in the From field when you compose a message. Secondly, use the Reply from the same address feature. This ensures that your responses always match the address the customer used to reach you.

Furthermore, create separate folders and labels for each of your domains. This lets you see at a glance which business needs your attention right now. Also, use different colored stars or tags to mark urgent emails for each brand. Lastly, set up automated filters to sort incoming mail into the correct categories before you even see it. Truly, these small habits prevent you from feeling overwhelmed by a busy inbox. It allows you to switch between different business roles in just a few clicks. This is why the most efficient owners spend time perfecting their Gmail filters.


Phase 4: Managing Shared Drives and Collaboration

The fourth phase is about keeping your files and documents organized across different brands. Clearly, having one giant pile of files is a recipe for disaster. Therefore, you must use Shared Drives to create clear boundaries between your various domain projects.

Keeping Your Files Organized and Secure

Firstly, create a separate Shared Drive for each of your primary and secondary domains. This ensures that only the people working on a specific brand have access to those files. Secondly, use clear naming conventions for all your folders and documents.

Furthermore, manage your sharing permissions very carefully. Never share a folder with the entire organization if it only belongs to one specific brand. Also, utilize the search engine within Drive to find documents quickly across all your domains. Lastly, regular audits of your file permissions will keep your data safe and compliant. Truly, a clean file system is just as important as a clean inbox for business success. It turns your digital storage into a powerful asset rather than a confusing mess. This ensures your team can find what they need without asking for help every day.


Best Practices: Maintaining Your Multi Domain Setup

Keeping your Google Workspace healthy is an ongoing task that requires a steady hand. It needs a focus on regular maintenance and staying updated with the latest 2026 features. Clearly, an organized account today can still become messy tomorrow if you are not careful. Therefore, follow these simple steps to maintain your high standards.

Strategies for Continued Organization and Success

Firstly, perform a monthly audit of your user list and domains. Remove any addresses or people that are no longer active in your business. Secondly, update your organizational units as your company grows or changes its structure.

Furthermore, keep a close eye on your search engine performance for each of your domain websites. Use the data to see which brands are growing the fastest and need more resources. Also, encourage your team to follow the same labeling and filing rules that you use. Lastly, stay educated on new Google Workspace updates that make managing multiple domains even easier. Truly, organization is a journey that pays off in higher productivity and lower stress. It builds a strong foundation for a multi brand empire that is easy to manage. This secures your competitive advantage in the digital landscape of 2026.


Frequently Asked Questions (FAQs)

Q1: Can I have different logos for each domain in Google Workspace?

Yes, you can set different logos by using Organizational Units. This ensures that the correct brand identity is shown to users in each part of your business.

Q2: Does having multiple domains affect my search engine ranking?

Managing them in one account does not hurt your rank. In fact, a fast and organized setup can help improve your site performance, which is a key ranking factor.

Q3: Do I have to pay for an extra license for a secondary domain?

No, you do not pay for the domain itself. However, if you create a new user account with that domain, you will need a standard license for that specific user.

Q4: Can one user have email addresses at two different domains?

Yes, you can add an email alias to a user. This allows them to receive and send mail from both domains using a single login and inbox.

Q5: What is the limit on how many domains I can add?

Most Google Workspace accounts allow you to add up to 600 domains, including your primary domain and all secondary or alias domains.

Also Read: How to Fix Google Sheets Slowdowns for Better Productivity

Gmail Storage Full? Use These Simple Search Hacks

Many people use Gmail every day. Therefore, it is a key part of daily life. Gmail is connected to Google Drive and Google Photos. However, all three share one storage space. Truly, this space is usually 15 GB for free accounts. Consequently, this storage can fill up very fast. You need to know why your space is gone. You must also know how to clean it up safely.

Some people think only emails fill up Gmail. But, this is not true. Files in Drive take space. Photos also take space. When the storage gets full, you cannot receive new emails. Furthermore, this can cause big problems. Always remember, cleaning your Gmail storage is easy. By following simple steps, you can free up gigabytes of space. You can do this without losing any important messages.

Gmail Storage Full? Use These Simple Search Hacks


The Storage Mystery: Where Did My 15 GB Go?

First, let’s solve the common mystery. Where does the storage space actually go? Your total Google storage is shared across three main services. Clearly, understanding this sharing is the first step to cleaning up. Therefore, you must look at all three areas, not just your email inbox.

The Three Space Hogs

Your 15 GB of free space is divided among these three services:

  • Gmail: This includes all messages in your Inbox, Sent, Spam, and Trash folders. It also includes the file attachments in those emails.

  • Google Drive: This stores files like PDFs, documents, spreadsheets, and other files you upload. However, Google Docs, Sheets, and Slides files usually do not count.

  • Google Photos: This stores all photos and videos backed up from your devices. Note that photos uploaded before June 2021 often do not count toward your limit.

Truly, your storage is most often consumed by large video files in Drive. It is also taken up by massive email attachments. Focus your cleaning efforts on these large files.


Pillar 1: Cleaning Gmail – Finding the Biggest Emails

The first place to clean is your Gmail account. Most of the space is hidden in old emails with large attachments. Clearly, deleting just a few of these large emails can free up hundreds of megabytes instantly. Therefore, you must learn to search for the largest files quickly.

Simple Search Hacks to Find Large Files

Firstly, use the search bar to find emails bigger than a certain size. For example, type this into the search bar: size:10m. This shows all emails larger than 10 megabytes. Secondly, target older emails. You probably do not need huge attachments from years ago. Type: has:attachment before:2020/01/01. This shows all emails with attachments sent before January 1, 2020.

Furthermore, sort your inbox by size. Click the gear icon (Settings). Then, go to “See all settings.” Now, click “Inbox.” Change the inbox type. Also, check the “Sent” folder. Many people forget that large files they sent are also stored in their account. Delete these large sent items first. Also, empty your “Spam” folder. Spam usually gets deleted automatically. However, manually emptying it can free up space immediately. Lastly, empty your “Trash” folder. When you delete an email, it stays in Trash for 30 days. You must empty the Trash to truly free the space. Truly, using these simple searches and checks allows you to find and remove the biggest space-consuming files quickly.


Pillar 2: Clearing Google Drive – Targeting Hidden Files

The second key area is Google Drive. People often upload large files here. They forget about them. These files can take up huge amounts of space. Clearly, you must find the largest files in Drive. Therefore, there is a special section built just for this cleanup.

Finding and Deleting the Largest Files

Firstly, go to your Drive storage page. This shows a list of your files. This list is automatically sorted by size. The biggest files are at the top. Secondly, delete unnecessary large files first. Look for video files, zip archives, or old backups. These are usually the largest items.

Furthermore, check your “Trash” folder in Drive. Just like in Gmail, deleting a file moves it to Trash. It still counts against your limit until you empty the trash. Go to your Trash folder. Then, click “Empty trash.”

Also, look for “Hidden App Data.” Some apps store data in Drive that you cannot see in your main folder. Go to Settings in Drive. Click “Manage Apps.” If any app lists data, you can delete it there. Lastly, review files that are “Shared with me.” Files shared with you do not count against your limit unless you copied them. Check your “My Drive” folder for large files you own. Truly, focusing on the largest files you own in Drive is the fastest way to gain significant storage back.


Pillar 3: Managing Google Photos and Other Sources

The third source of storage use is Google Photos. This is especially true for users who have backed up large videos or photos recently. Clearly, you must manage your video and photo library effectively. Therefore, you can use the built-in management tools.

Finding and Deleting Large Photo/Video Files

Firstly, use the Google One Storage Management tool. This is a dedicated page. It shows all your biggest files across Gmail, Drive, and Photos in one place. Secondly, use the “Review and discard” feature in Google Photos. This tool identifies blurry photos, screenshots, or very large videos. You can review them and delete them easily.

Furthermore, delete old, unwanted videos. Videos take up much more space than photos. Focus on deleting long, unwanted video clips first. Also, check your computer’s backup. Some people back up their entire desktop or documents folder to Drive. Check your Drive settings. See if any large folders are being backed up unintentionally. Lastly, remember that deleting files must be followed by emptying the Trash in both Gmail and Drive. This is the only way to release the space back to your account. Truly, using the dedicated management tool gives you the best, clearest overview of where your storage is going.


Best Practices: Keeping Important Emails Safe

The main concern when cleaning up is losing important emails. You must ensure that only junk or old, unnecessary files are deleted. Clearly, using the right tools and strategies prevents accidental loss. Therefore, follow these best practices to keep your important emails safe.

Strategies to Protect Valuable Information

Firstly, never delete files without searching first. Use the size and date search queries provided in Pillar 1. This ensures you only target old, large, generic emails. Secondly, use labels and archiving. If an email is important but you do not need it in your inbox, archive it. Archiving removes it from your main view. However, it keeps it in your account.

Furthermore, create an “Important Attachments” folder in Drive. If you have an email with a huge, vital attachment, download the attachment to your computer. Then, upload it to Drive into a special folder. Delete the original email afterward. This saves space. Also, use the “Export data” tool (Google Takeout). If you have very old emails or documents you want to keep but not store in Gmail, download them. You can save them to your computer or an external hard drive.

Lastly, double-check the Trash before emptying it completely. Take a final look through the Trash folder. Make sure no recently deleted important items are inside. Truly, by using labels, archiving, and external backups, you can clean your inbox aggressively without risking important information.


Frequently Asked Questions (FAQs)

Q1: Does deleting emails from my phone also delete them from my computer?

Yes, it does. Gmail syncs across all devices. When you delete an email on your phone, it moves to the Trash folder everywhere, including your computer’s browser.

Q2: How long does it take for my storage space to refresh after I empty the Trash?

The storage space usually refreshes quickly, often within minutes. However, Google warns that it can sometimes take up to 24 hours to fully reflect the deleted space.

Q3: Does deleting files from my shared Google Drive count toward my 15 GB limit?

No, it does not. Files that are only shared with you do not count toward your limit. Only files that you own and that are in your “My Drive” folder count against your 15 GB limit.

Q4: If I delete a large file from Google Drive, is it gone forever?

No, not immediately. When you delete a file from Drive, it moves to the Trash. It stays there for 30 days. It still counts against your storage limit during those 30 days. You must empty the Trash to free the space.

Q5: If I upgrade to Google One (paid storage), will my Gmail run faster?

Upgrading your storage will not make Gmail run faster. It only increases the limit (e.g., from 15 GB to 100 GB). Gmail’s speed depends on your internet connection and computer performance.

Also Read: What to Expect from Google Workspace in 2026

Is Gmail Scheduled Send Your Best Productivity Hack

In the demanding world of modern business, email remains the central hub of professional communication. However, managing an overflowing inbox and ensuring timely responses can quickly become overwhelming. Consequently, for busy professionals, any tool that enhances efficiency and ensures important messages are addressed is a game-changer. Truly, Gmail built-in features—Scheduled Send and Follow-Up Nudges—are precisely those kinds of tools. They move beyond simple functionality, offering intelligent solutions that help you master your communication timing and never let a critical thread fall through the cracks. Therefore, understanding and leveraging these features is essential for boosting productivity in 2025.

Many professionals fall into the trap of reacting constantly to their inbox, sending emails the moment they write them, regardless of the recipient’s time zone or work schedule. Furthermore, they often rely on manual reminders to chase up unanswered emails, an unreliable and time-consuming process. Scheduled Send and Follow-Up Nudges solve both of these problems simultaneously.

The former allows for strategic timing, while the latter employs Google’s AI to act as a tireless, proactive assistant, ensuring no conversation is forgotten. Always remember, the goal is not just to clear your inbox, but to communicate smarter and with greater impact. By integrating these clever features into your daily workflow, you can regain control of your time and significantly increase your response rates.

Gmail’s Scheduled Send & Follow-Up Nudges: Newest Tools


The Strategic Advantage of Scheduled Send


To begin with, let’s explore the immense strategic potential of Gmail’s Scheduled Send feature. Simply put, Scheduled Send allows you to write an email now, but automatically deliver it at a perfect time later. Clearly, this functionality is much more than a convenience; instead, it is a powerful tool for optimizing communication impact, respecting boundaries, and managing your own energy levels. Truly, the ability to control when your email lands in the recipient’s inbox is a significant advantage in the competitive world of professional outreach.

Timing Your Message for Maximum Impact


Naturally, the primary benefit of Scheduled Send is maximizing open and response rates. Research consistently shows that emails sent during peak business hours (like Tuesday to Thursday mornings) often receive the best engagement. If you are working late at night or over the weekend, sending an email immediately might mean it gets buried under a flood of new messages the next morning. Therefore, scheduling that same email to arrive precisely at 8:00 AM on a Tuesday gives it the best chance of being seen and acted upon promptly.

Secondly, Scheduled Send is crucial for managing time zones. If you work with clients or colleagues across the globe, scheduling ensures your message arrives during their working day, not in the middle of their night. This thoughtful approach shows professionalism and respect, strengthening business relationships. Furthermore, it helps you maintain personal boundaries. You can tackle your email backlog during your “power hours” or preferred work time without disrupting your colleagues’ evenings or weekends. This contributes to a healthier work-life balance for both you and your recipients. Truly, Scheduled Send transforms email delivery from a reactive process into a precise, strategic act.


The AI Power of Follow-Up Nudges


While Scheduled Send is a manual tool for proactive timing, Gmail’s Follow-Up Nudges are powered by machine learning, acting as a smart, automated safety net. Clearly, this AI feature is designed to ensure that important conversations never stall simply because you forgot to follow up or reply. Truly, it eliminates the need for manual to-do lists and external reminders, centralizing your communication management right inside your inbox. Therefore, leveraging this AI assistant is crucial for maintaining excellent professional responsiveness.

How AI Nudges Keep Conversations on Track


Firstly, the Nudges feature works in two critical ways. It reminds you to reply to incoming emails that Gmail thinks you might have missed. For instance, if an important email from a client or a direct question from a colleague remains unanswered for a few days, the thread will be automatically bumped back to the top of your inbox with a helpful “Nudge” suggesting a reply. This prevents critical requests from being overlooked in a busy flow of new mail.

Secondly, Nudges remind you to follow up on sent emails that haven’t received a response. If you’ve sent a proposal, a request for information, or a deadline reminder, and a few days pass without a reply, the original message will reappear at the top of your inbox with a prompt like “Sent X days ago. Follow up?” This is particularly valuable in sales, project management, and cross-departmental coordination, where consistent follow-up is essential for closing deals and hitting deadlines.

Furthermore, the AI uses context and past conversation patterns to determine which emails are most likely important, making the suggestions highly relevant. Truly, Nudges ensure that your professional communications are both timely and persistent, significantly increasing your overall effectiveness and helping you appear more organized.


Tricks and Best Practices for Scheduled Send


Mastering the Scheduled Send feature requires adopting a few key tricks and best practices. Simply clicking “Schedule Send” isn’t enough; instead, strategic use transforms the feature into a productivity powerhouse. Clearly, integrating this functionality seamlessly into your writing and review process maximizes its benefits, ensuring both polish and impact. Therefore, these tips will help busy professionals elevate their use of this simple tool.

Maximizing Efficiency and Avoiding Common Pitfalls


Firstly, use the “Pause and Review” trick. Write complex or sensitive emails late in the evening when you have focused time, but schedule them to send the next morning. This gives you a crucial “cooling-off” period to review the message with fresh eyes before it goes out. This pause helps eliminate typos, correct tone, and ensure accuracy, which is excellent for high-stakes communications.

Secondly, pre-schedule internal reminders and announcements. If you have a standing meeting every Monday morning, you can write and schedule the reminder email the previous Friday. This offloads a repetitive task, ensuring your Monday morning is clear for high-priority work. Furthermore, be mindful of time zone settings. When scheduling for international contacts, always select the delivery time based on their local time zone. This is a small detail that shows immense professionalism.

Conversely, one major pitfall to avoid is scheduling an immediate follow-up. Always build a three-to-five-day buffer to allow the recipient sufficient time to reply before your scheduled message appears, preventing awkwardness or redundancy. Truly, these smart practices ensure Scheduled Send serves as a consistent, strategic asset in your communication arsenal.


Integrating Nudges for Superior Inbox Management


Follow-Up Nudges work best when you understand how to integrate them into a larger inbox management strategy. Clearly, the AI acts as a suggestion engine, but your manual actions determine its ultimate effectiveness. Truly, a seamless workflow combines the AI’s assistance with your own organizational systems, leading to superior responsiveness and less mental clutter. Therefore, making small adjustments to your settings and habits can significantly enhance this feature.

Working with AI for Flawless Follow-Up


Firstly, trust the AI, but verify. Gmail’s Nudges are highly accurate, but they are not infallible. Use the Nudge as a prompt to check the original email thread. Did you receive a partial reply? Has the context changed? The Nudge simply reminds you to follow up, but you still need to craft a valuable, context-aware message. Conversely, if a Nudge seems irrelevant, simply dismiss it or archive the conversation to help the AI learn your priorities over time.

Secondly,pair Nudges with the Snooze feature. If an email is Nudged back to the top, but you know you can’t address it until a specific future date (e.g., after a meeting next week), use the “Snooze” feature. This manually hides the email, setting a custom time for it to reappear. This prevents the Nudge from becoming a constant distraction while keeping the item firmly scheduled for future action.

Furthermore, ensure Nudges are enabled for both incoming replies and outgoing follow-ups in your Gmail settings. This simple setting activation ensures you benefit from both sides of the AI-powered reminder system. Truly, by actively engaging with Nudges and integrating them with other inbox tools, you transform your email management into a dynamic, intelligent system that drastically improves professional reliability.


The Professional Payoff: Productivity and Perception


The true payoff for busy professionals who master Scheduled Send and Follow-Up Nudges is twofold: a dramatic increase in personal productivity and a significant improvement in professional perception. Clearly, these benefits extend far beyond simply processing emails; instead, they influence how clients, colleagues, and partners view your reliability and efficiency. Truly, a professional who communicates effectively and follows through is highly valued in any organization. Therefore, these tools offer a tangible competitive advantage.

Driving Efficiency and Building a Reputation for Reliability


Firstly, in terms of productivity, these tools allow you to separate the task of writing from the act of sending. You can batch email composition during focused work blocks, knowing the messages will be delivered at the optimal time later. This separation minimizes context-switching, a notorious drain on focus. Furthermore, Nudges essentially automate the complex mental task of memory and tracking, freeing up cognitive resources for high-value strategic work.

Secondly, regarding professional perception, timely communication is everything. Scheduled Send ensures you appear respectful of others’ time zones and inboxes, even when you work non-traditional hours. Nudges ensure you never miss a deadline or let a request languish, building a reputation for impeccable follow-through and responsiveness. Always remember, consistency in communication signals professionalism and reliability. Truly, by making these two Gmail features foundational to your daily routine, you not only manage your inbox more efficiently but actively enhance your standing as a reliable, high-performing professional.


Frequently Asked Questions (FAQs)

Q1: Can I cancel an email after I use Scheduled Send in Gmail?


Yes, you can easily cancel a scheduled email before its delivery time. Simply navigate to the “Scheduled” folder in the left-hand menu of Gmail, open the email you wish to stop, and click the “Cancel send” button at the top right. The email will then be moved back to your Drafts folder for editing or deletion.

Q2: How do I turn on or adjust the Follow-Up Nudges feature in Gmail?


To enable or adjust Nudges, go to Settings (gear icon) -> See all settings -> General tab. Scroll down to the Nudges section and ensure both options are checked: “Suggest emails to reply to” and “Suggest emails to follow up on.” You can also adjust the frequency of these reminders.

Q3: What happens if the recipient replies just before my scheduled follow-up sends?


Gmail’s Schedule Send is not “smart”; it will send the email at the programmed time regardless of whether a reply has been received in the meantime. To avoid this awkward situation, it is best practice to manually check the thread before the scheduled time or use a manual tool like “Snooze” instead of pre-scheduling a follow-up.

Q4: Are Nudges only for emails I send, or do they apply to emails I receive too?


Nudges apply to both. Gmail’s AI uses Nudges to remind you to reply to emails you have received (if they seem important and are unanswered) and to follow up on emails you have sent (if you haven’t received a reply after a few days).

Q5: How can Scheduled Send help me manage my work-life balance?


Scheduled Send helps manage work-life balance by allowing you to write emails when it is convenient for you (e.g., late at night or on a Sunday) but deliver them during standard business hours. This sets appropriate boundaries for both you and your recipients, preventing the expectation of immediate, off-hours responses.

Also Read: Is Pageless Docs the Future of Teamwork in 2025?